Showing posts with label Alcohol inks. Show all posts

Tuesday, 31 March 2026

New STAMPLorations ATCs

Hello crafters,

I am so pleased to introduce you to the latest addition to the STAMPlorations line-up: ATCs, a collection of 3 themed packs. The release post is on the 
STAMPlorations blog

For my first make I used the Retro Femme ATC:

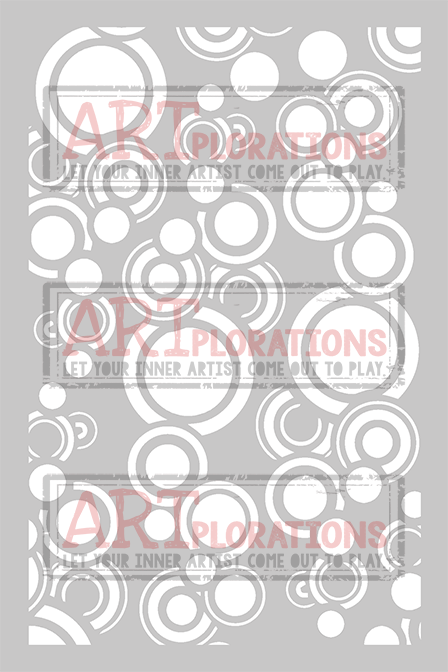
I combined this colourful image with acetate and alcohol inks, using the Retro Circles stencil with Alcohol Lift ink to get the background motif.

I applied double sided adhesive to the back of the first ATC and placed it on the acetate.

Then I placed a second ATC, with the adhesive on the image this time on the inside of the card, to allow for a message to be written: 


It also means the back of the card is just as nice as the front!


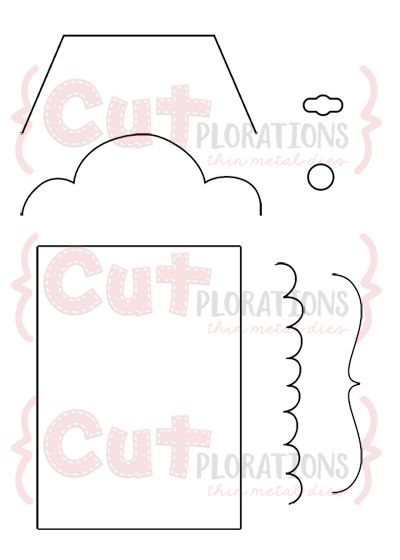
My second card features the Whimsical Homes ATCs and a new shape for me... the Double pillar card, chosen to showcase the ATC sized image as best as I could.

This is the front of the card, which folds flat, well almost, because the inside has a few layers, decorated with an image from the Spring Florals A2 Card Fronts set.

To construct this card, add the pillars to the inside of a standard base card and add "springs" made out of cardboard to attach the ATC to:

The finished card:

My final make features one of the 6 designs in the Color Me Spring ATC set:


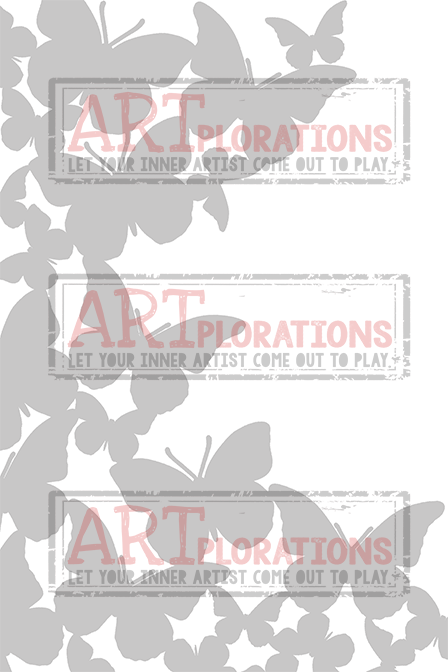
I used the Shower of Flutters stencil with Distress inks to create the background and die-cut a mat with one of the border from the ATC Tag builder set:


I added a sentiment composed from 2 word dies, Life is Good and You are my sunshine.

Phew... that is a looong post! I hope you stayed to the end and like what you see.

Thanks for coming by,
 Craftyfield   


Monday, 9 June 2025

City Travel

Hello crafters, 

today I have an inspiration make for our June Country View Challenge held in the Facebook group. This month the theme is "Travel" hosted by Zoe Hillman. 
I have chosen the Sizzix Vault Christmas Magic (666718) die set to drive my muse...


My background has been coloured with alcohol inks using a felt pad and the buildings have been die-cut from a piece of Gelli printed canvas textured card.
The car and lorries are fiddly to assemble because they are small but otherwise the scene was really easy to put together.
To match the naïve look of the die-cuts I used the AALL & Create #32 die set Numberama for my base.

Proof this set isn't just for Christmas!

*************

I hope I have inspired you to enter our challenge! To enter, hop on to our friendly group here and upload your project to the challenge album. You could win the Arden bundle pictured below.


Thanks for coming by,

 Craftyfield       I am entering the Simon Says Stamp Wednesday challenge

Tuesday, 5 November 2024

Hummingbird

Hello crafters!
Today I have a first inspiration make for our Country View Challenge held in the Facebook  group. This month the theme is "Winging It" hosted by Fiona.

I chose this Lavinia Hummingbird for my Winged creature as it is a recent addition to my stash.


My background is alcohol inks on yupo paper.  I stamped the Hummingbird Small (LAV894) and the Open Dandelion  (LAV745) with Brilliance inks, letting them dry a full 24 Hours before colouring.

Since I didn't have small nib sizes of acrylic or Posca pens, I used water based markers to colour the bird. Those eventually dried, but, being a transparent medium, the background colours do show through.

I wanted the Dandelion in white and tried gel pen on the petals with mixed results: yes the gel ink dried and yes it added a bit of white but not enough to hide the background colours. [Add to shopping list: small nib acrylic pen...].

I then used my new favourite die (AALL & Create die set #32 Numberama) to cut both image and mat, before assembly on a white base card.

To enter the challenge, hop on to our friendly group here and upload your project to the challenge album. You could win all 5 of the newly released Layer It Up Washis by AALL & create from the Country View Craft shop.

Thanks for coming by,

 Craftyfield     I am entering the Allsorts, Simon Says Stamp Wednesday
                                                         Stamping Sensations and We Love Stamping challenges 

Saturday, 8 June 2024

Seahorse and alcohol inks

Happy Saturday crafters!
Today I have a first inspiration make for our Country View Challenge held in the Facebook  group. This month the theme is "Seaside"

I dove deep in my supplies... 😉


The focal image is Sebastian by Lavinia (LAV496) stamped on a background made with the alcohol lift ink technique.
I added some bubbles with pencils and white gel pen, some stamped stars (LAV152) and after a long period of dithering left it at that lest I spoiled the background.

To enter the challenge, hop on to our friendly group here and upload your project to the challenge album. You could win a seaside inspired bundle by Art by Marlene.


Thanks for coming by,

 Craftyfield     I am entering the We Love StampingStamping Sensations,
                                                             Addicted to Stamps and  Allsorts challenges

Wednesday, 19 July 2023

Silhouette stamping

Dear followers and fellow crafters,

I have been trying to use products I haven't used in a while and today I played with alcohol inks and an embossing folder!  


The image is from Crafty Individuals (CI-471 Make a Wish) and the sentiment from CI-449 My Favourite Place.

I layered the matted image on a piece of Core'dinations embossed with the  Sizzix Tim Holtz  Embossing Folder - Lumber (662718) inked with Versafine in Pinecone.

There you have it, a bit of colour to enliven the day!

Thanks for coming by,

 Craftyfield   I am entering the Allsorts challenge

Friday, 9 June 2023

Paper Doll and Snippet tag

I am back for my last Vintage inspiration piece for our Country View Challenge, where the theme, Vintage, is one I favour.  Today's project is a tag: 


The base is a heavyweight cardstock cut into a tag. I collaged a piece of an old book (top left) and a piece of Tim Holtz/Idea-ology Botanical Collage Paper. 

I coloured the tag with several layers of Distress Oxides inks spritzed with water on the mat. 

The focal point is a paper doll and elements from the Tim Holtz/Idea-ology Ephemera Field Notes Snippets popped up on foam pads and a piece of muslin. 

 
I hope you have enjoyed all my Vintage makes and are inspired to join in our Country View Challenge! Remember there is a £20 voucher for the Country View Craft shop to be won....

Thanks for coming by,

 Craftyfield     I am entering the SSS Monday challenge and Allsorts challenge

Thursday, 5 May 2022

Cats aren't just for Christmas


For my previous inspiration make for the May  Country View Challenge, on the theme of Cats & Dogs, I used a very old set bought in Lakeland when they sold crafts items (I still rue the day they stopped!). But now I was in a quandary... what else could I possibly use for the theme?!
Well... Snarky Christmas cat to the rescue!


The background of the tag is a Gelli printed paper with layers of DecoArt Mixed Media fluid acrylics.
I stencilled some bricks (Tim Holtz Mini Stencil Set #43) on the right with a mixture of Cosmic Shimmer Multi-Tex, glue and Distress Oxide re-inker in Salvaged Patina. On the left I used the Tim Holtz Mini Stencil Set #28.

I stamped and paper pieced the cat from the Snarky Cat Christmas set (CMS416) without its distinctive Christmas hat and the ribbon knot on the box.
The sentiment is from the Snarky Cat Halloween set (CMS407) layered onto some of the AALL & Create Washi Tape #13 - Fasteners, which I also added below right.

And of course the dog from a Paper Dolls pack! Not sure this particular canine is that menacing but, the scene still made me smile...


Over to you now, have a look at what the DT made on the Country View Challenge blog and link up your project to the challenge for the chance to win a £20 voucher for the Country View Craft shop.


Thanks for coming by,

 Craftyfield    I am entering the PaperbabeAllsorts ans SSS Monday challenges

Tuesday, 1 September 2020

Complementary coasters

And the holiday season finishes with a whimper... not much to rejoice, so I am thankful for the enjoyment I get from crafting. Not quite sure what is going to happen this September school wise but at least our Country View Challenge is kicking off as expected.


This month Evelyn has chosen Complementary colours as the theme. I'm guessing lots of you will already know what complementary colour pairs are, but if not, any decent search engine should give you the necessary explanations.

Today I chose my favourite "male" colour scheme with blue-orange as the complementary pair.


I used alcohol inks with a plastic palette, alcohol lift ink and polymer plate to lift the print onto my MDF coasters, which I had first prepared with Gesso.


I cleaned up on separate pieces of cardstock, waste not want not... and on a whim added gold foil on what appeared to be still sticky.

Then, I simply stamped quotes from Paper Artsy set HP1901 and HP1206. I have a few more coasters to do so I will leave the finishing for some other time, but these will need protecting with several layers of varnish, preferably one that can take high temperatures for hot drinks.


Over to you now, have a look at what the DT made on the Country View Challenge blog and link up your project to the challenge for the chance to win a £20 voucher for the Country View Craft shop.

Thanks for coming by,
I am entering the SSS Wednesday and Paperbabe  challenges.

Tuesday, 21 July 2020

Pushing the Dandelions

Today I have another make for the Country View Challenge where the theme is "Do More Of What Makes You Happy", chosen by Sue. So use your happy colours, favourite stamps etc..

This turned out completely different to what I had planned... As I love scenescapes, I was going to ink my way through a classic whimsical landscape in the Lavinia style with my new stamps.
After a number of false starts I have ended up with an alcohol ink background and my old favourite Lavinia stamps. Still, also something that makes me happy...


I made the background by spreading alcohol inks on a piece of plastic (you can use yupo, metal or any kind of non absorbent substrate) as my "palette" and used alcohol lift ink and an oval polymer plate to lift the colours and transfer on my white card.

I stamped all 3 flowers from the Dandelions set  in black Versafine, curving the stalks as I wished and added the faerie (Mia isn't in stock at the moment but there are plenty of other fairies here).

For finishing touches, I added a piece of paper lace coloured with Oxide Distress inks in Walnut, a flower die-cut (X-cut Trim Borders) and a die-cut sentiment (All occasion Dies).

You still have 10 days to link to our Country View challenge, plenty of time to do something that makes you happy, and maybe win a £20 voucher which will definitely make you happy...

Thanks for coming by,

Wednesday, 1 July 2020

Experimenting with alcohol


This should be treat for everyone... My team mate Sue has chosen "Do More Of What Makes You Happy" as the theme of our Country View Challenge this month so all you have to do is use your happy colours, favourite stamps etc..

My faithful readers will know I am a bit of a technique junkie and will not be surprised that, for my first make, I chose to test a new one for me: Gelli printing with alcohol inks. Yes, trying new things makes me happy!!!

As this was a bit of an experiment and I had to work quickly before the inks dried I didn't take any photos but no fear my method is inspired by a video from Barbara Grey who can explain better the process! But in a nutshell, this is what I did:

1. I applied alcohol inks on the plate, added a bit of alcohol, spread the colour with a brayer and placed my stencil on top.
2. With Archival ink and the felt tool I applied colour through the stencil.
3.  removed the stencil, let dry the inks a few minutes and brayered some white acrylic paint on top, then lifted my print with a piece of card.
4.Optionally you can use the alcohol ink remaining on the stencil to create one or more prints by reviving the dried up inks with sprayed alcohol (NOT blending solution).

I managed to get a few interesting backgrounds and some not so great but it is a fun technique. The alcohol inks haven't stained my Gelli Plate except for the yellow (Lemonade), not the end of the world as it is a light colour.

I didn't want to hide the background, which I see as a view over a coastal town surrounded by hills, so I just added some birds (I re-positioned the stencil for that) and the sentiment which I embossed in Midnight Blue.


Supplies:
Ranger Alcohol inks
Archival Mini inks pads Kit 4
Visible Image Strobes stencil
Visible image Where the Dreams take you stamp set
Visible Image Ahead Of Our Time stamp set (the birds)
Versamark Inkpad
Midnight Blue Embossing powder

Over to you now, have a look at what the DT made on the Country View Challenge blog and link up your project to the challenge for the chance to win a £20 voucher for the Country View Craft shop.


Thanks for coming by,
I am entering the SSS Wednesday, Paperbabe, We Love To Create  challenges.

Sunday, 12 January 2020

New favourites

There's  nothing like new crafting supplies to spur you on....

I got myself some stamps from Lavinia's latest release, obviously my new favourites, and admired their new papers too (Scene-Scapes) which led me to try getting a similar result with alcohol inks (you can see the particular Scene-Scape here) .


I have no in progress photos as I had 2 false starts and had to scrap my first backgrounds. When working with alcohol inks the choice of card is paramount, but I seem to have forgotten this! Just shows how rarely I use the inks...

To get the effect I was after I needed a non porous substrate and Yupo was the answer. It is very forgiving as you can carry on adding alcohol inks or taking them off with Alcohol blending solution until you are happy. This is how I built the top of  the background, establishing a "sky" and "landscape".  I cut a circle to mask the moon.

The foreground was created with shades of grey alcohol pens and masks I hand cut from washi tape. I  sacrificed some of my lovely Prima tape for this, because of its large width, and I cut it in 3 different hill shapes.

With the background in place, the next step was the stamping. Given this is Yupo paper regular dye or pigment inks wouldn't dry so I used Archival, although I hate doing that, first because the stamp is permanently stained and second because solvent inks and cleaners aren't recommended for polymer stamps.
But I had a vision.... so I HAD to do it!

The stamps I used (all Lavinia) are:
Berry Leaves both sizes at the top
Badger
Winter Berry Mini next to the badger, stamped over the mask and mostly upside down.

I am happy with the result although the background isn't as beautiful as Lavinia's Scene-Scape. I do think I might pick them up next time and concentrate on the stamping!

Do let me know what you think!

Thanks for coming by,
I am entering the Lavinia,  Stamping Sensations, SSS Monday and Craft Stamper TIMI challenges.

Wednesday, 11 September 2019

Heavy lifting

Alcohol Lift Ink Detail view

Yes it's time for my second inspiration make for the Country View Challenge, where the theme chosen by Rachel is Under the Sea.

This time I used alcohol inks to build up my background, and, together with the Alcohol lift ink and Yupo paper from Ranger, I had great fun creating water effects .

Lifted alcohol inks with stamps

First I tried to simulate the broken light seen in moving water by using crumpled plastic to lift the ink, then with a small eraser and embossing tools I lifted the bubbles above the fish.

I then stamped my fish (Paper Artsy Hot Pick 1111) with Memento Tuxedo black ink on a piece of paper prepared with an iridescent medium and fussy cut them before placing on my background.

At this point I decided to add "coral" by lifting the colour with the top of a tree stamp. You can see the before photo:

To achieve the effect,  I actually stamped the "coral" twice, once with the Alcohol lift ink and once with an Archival ink. The first pass with the Alcohol lift ink allowed me to lift most of the colour and the second pass added a bit of colour (one was stamped in pink the other in orange) which was blotted to leave just a hint of colour.
The technique relies on having a stamping platform but it is very effective, even on such fine detail as these tree branches (a Crafty Individual stamp from the CI- 450 set).

I will leave you with the shine shot and hope you will join us at Country View Challenges with your own Under the Sea creations!


Thanks for coming by,
I am entering the SSS Monday, SSS Wednesday, Lost Coast Designs (inspired by the Disney song Under the Sea...) and Craft Stamper TIMI  challenges.

Tuesday, 16 July 2019

You are strong

I have a "quick" CAS card to show you today as I have been inspired to enter a few challenges to kick start my mojo back into action.

The first prompt is from CAS stencil who suggested we used Alcohol ink lifting technique.


Of course I wanted to use it with a stencil and chose one from the Tim Holtz Layering Mini Stencil Set #35.

While pouncing the smoothie to lift the alcohol ink I also applied it where there was no ink, resulting in a positive-negative view of the design.


My focal image is the Flora woman stamp from Cherry Pie and the sentiment is a sticker from the Shine Bright set by STAMPlorations.

Quite a fabulous product this Lift-ink...

Thanks for coming by,
I am also entering the Artistic StamperAddicted to stamps, AllsortsCraft Stamper  and CAS Mix up challenges.

Saturday, 25 August 2018

Memories of summer

Time for a second inspiration piece for our Country View Challenge on the theme Sun, Sea and Sand chosen by Corrie. I have made a card with another piece of alcohol background on Yupo using Tim Holtz's Alcohol lift ink.

Wednesday, 1 August 2018

Sun, sea, sand and alcohol

With the sweltering heat no wonder we are thinking of holidays in the sun at Country View Challenges….

I wouldn't recommend throwing alcohol in the mix, but hey, I had to try my new supplies, fresh out of Tim Holtz' release. I tested the Alcohol Lift Ink and I am now sharing the results of my experiments.

Monday, 6 November 2017

Christmas Tags

In what is becoming an annual event I have been making my "rubbish" tags again....


As you can see they are all different, which is not ideal for mass making but is an excellent way of using up some scraps, rather than binning them.... hence the "Rubbish" tag moniker!


Deer tag:

Creative Expressions Warped Circles Stencils
D. Oxides in Picked Raspberry and Twisted Citron
Memory Box Deer die-cut
Scrap of foiled cardstock.
Versafine ink
Wow Embossing powder in Fairy Tale


X-mas tree:

Crafter's Companion Pearlescent patterned cardstock
Memory box Christmas tree die
Green Distress and pigment inks
Wow Embossing powder in Fairy Tale
Die'sire Merry Christmas die

Butterfly tag:
Gelli print with Starlight paints
TCW Mini Specimen stencil (TCW454S)
Grunge paste tinted with acrylic paint
Versafine ink
Clear EP
Stamp from my own collection

Branches tag:

MFT Snowfall Stencils
Branches Die-cut
Prima Heavy Gesso
Graphmaster acrylic paint marker
Merry Christmas stamp (Freebie from magazine)
Versamark
White EP
Signpost Tag :

Gloss paper and Ranger alcohol inks
Spellbinders Victorian Signpost S2-177 die
White embossing powder
Merry Christmas stamp (freebie from magazine)

The light conditions are so difficult at this time of the year I photographed all my tags in direct sunlight to show the shine and also in the shade to give a better idea of the colours, especially for the very shiny Butterfly and Signpost tags.

Let me know what you think!

I am entering the following challenges: Addicted to stamps, SSS Wednesday Challenge, Paperbabe, WOW Embossing powders and Vintage Journey (I don't know about marvels but all my tags are indeed less than 4").