' ' ' 'Crafty Endeavours: December 2018

Monday 17 December 2018

Big wishes

If you need more inspiration to enter the STAMPlorations Theme and Sketch challenge this month, here is my take on the sketch AND the theme. Don't worry you can choose either for the chance to win a prize!


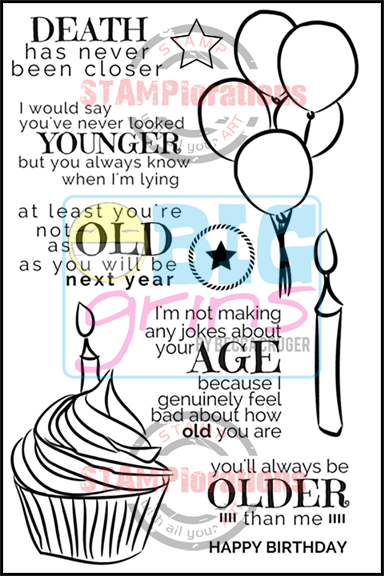
I used double sided paper to create the shape on the sketch and the balloons and stars from A Snarky Birthday to You stamp set, stamped with coloured inks.

To colour the images I used watercolour pencils and a water brush.

The star of the show is the BIG Birthday Wishes Phrase Die - CUTplorations, which I die-cut from glitter card.


Still 2 weeks to enter the challenge, and yes I know it's a busy period but take some time out and enjoy some stamping, colouring or die-cutting. Check out today's post on the STAMPlorations blog for more inspiration, for this challenge and all other STAMPlorations December challenges.

Whenever you shop for STAMPlorations products you can get 20% off with my code: STAMPGIRLCRAFTY

Thanks for coming by,
I am entering the That's Crafty, Craft Stamper TIMI  challenges.


Saturday 15 December 2018

More idea with globes

Something a little different today for the Crafts U Love inspiration post. My first post used the Crealies Cardzz No. 8 Snow globe for a winter make, keeping to the traditional snow globe.
But what to do with the die set after the holidays you might ask?
Well, I thought about that too and have come up with a few ideas...

Firstly, it is possible to use the globe in the same way I did on my previous card here but with a summer theme. You can add sand for the shaker element instead of snow, and the wave die in the set can be used for dunes or indeed waves!

A house with a garden, a cityscape, a landscape and lots more themes are equally suitable for the globe.

But this die can do more than globes with a bit of die-cutting wizardry...

I'll start with a simple card base:


The steps were as follows:

With the base card folded in 2, place the die to the first "step" of the die and emboss with your die-cutting machine. This is to make the alignment easier later.

 Open the card and place the die again following the embossing lines and cut the first side of the card.


Repeat for the second side, you have now a shaped based card! Following the same method but cutting up to the second or third step you will get alternative versions of this. More on that later...


For now, this is how I decorated my card. I placed some snowflakes cut from a die-cut panel with John Next Door Christmas Die Set - Lattice (you can read here how to maximise the use of that die-set) and stamped the circled Mixed Media plate with Salty Ocean Distress ink applied with a brayer.


Since there was still ink on the Mixed Media plate I stamped the back of the card too..

For my images I used the Elizabeth Craft Stamp Set - Reindeer and stamped all the elements with black Versafine. I added colour with markers and gel pens.

For the sentiment I used the John Next Door Clear Stamp Set - Poinsettia and embossed the sides with Wow! embossing powder in White Twinkle.


Taking the partial die cutting further and cutting one or 2 of the remaining "steps" on the Snow Globe die you can create the base for an album.

Here I have created one using all the steps for a maximum of pages available and this is the result after partially die-cutting both sides.
You can also cut 2 entire globes separately and glue them together if you find this method too difficult.


Now fold along the score lines into successives mountains and valleys to obtain this:

The album can is constructed by gluing pages onto the spine created. The pages can be cut with the globe die, the smaller die in the set to fit in within the half circle cover or be any shape you wish as I die here:


Now all you need to do is decorate cover and pages to your liking...

Supplies:

Crealies Cardzz No. 8 Snow globe
Elizabeth Craft Stamp Set - Reindeer
John Next Door Clear Stamp Set - Poinsettia
WOW! Embossing Glitter - White T
Tim Holtz Distress Oxide Ink Pad - Salty Ocean
John Next Door Christmas Die Set - Lattice
John Next Door Media Plates Set
VersaFine Onyx Black

If you fancy the Snow Globe die or the Reeinder stamp set, you're in luck as all the Christmas products are now 50% off at Crafts U Love but you'll have to be quick!

Should you purchase any of the products I have used on this card, select  'Design Team'  in the 'where have you seen us' drop down so we know we have inspired you!

Thanks for coming by,
I am entering the Fashionable Stamping, Addicted to stamps,
Lost Coast Designs and SSS Monday challenges.

Around the globe

Today I am showing an inspiration make for Crafts U Love. With the Christmas cards made and sent, for the most part, time to think about the New Year.


Sunday 9 December 2018

A little work

Little indeed... way too small to cram much into it, but on the upside small enough to be made in an afternoon and just make the deadline for the Paper Artsy Matchbox challenge!


The outside of the box has been stamped with JM06 and embossed in Wow embossing powder in Perissa, a gorgeous rose gold.

The box itself has been prepared with a coat of PA Fresco paint, then stamped with MN30 (small hand script) and the branch from HP1008 stamp set.


I added mica flakes and microbeads at the bottom, as a sort of ground for my Paper Doll, and if you look closely you'll see the glue hasn't even dried yet!

A few die-cut stars with gold mica powder and voila, set and matchbox!

Thanks for coming by,
I am also entering the SSS Monday Challenge (my B is for Box), SSS Wednesday Challenge, Creative ArtisteVintage Journey and That's crafty challenges.

Wednesday 5 December 2018

Let it snow Christmas tree and night sky

If you are coming from Country View Challenges blog, you've come to the right place for my second inspiration make on the Christmas theme.


Distress Inks and torn scraps of paper created the sky and the hills.

The fir tree stamp is from Crafty Individuals and the Let it Snow sentiment has been die-cut from glitter paper with a CUT-ploration die.

I added falling snow with white acrylic paint through MFT Snowfall stencil.

I hope you like my brightly coloured Christmas card and  you will join us at Country View Challenges for the chance to win a £20 voucher.

Thanks for coming by,
I am entering the  Lost Coast Designs, The Artistic Stamper, Stamping Sensations, That's Crafty, Addicted to stamps challenges.

Saturday 1 December 2018

Xmas Village in the wood

Can you believe Christmas is less than a month away!! But there it is, and it's no coincidence we have chosen Christmas as our theme for this month's Country View Challenge!


I am trying to use up some old supplies in an effort to streamline my stash (yes, as if that's going to do it!) and pulled out this positively ancient sheet of peel offs with Christmas images. I remember buying it as I loved the image but, when it came to it, I had no idea how to make it look nice.

Taking the bull by the horns, I placed the line design on a piece of painted card, a mix of Fresco paints and Infusions. I coloured the robin with pencils to make it pop and some other touches here and there to give the design a bit more life.

For my background, I created a panel with Sizzix Tim Holtz Alterations 3-D Embossing Folder - Lumber and Distress Oxides (Walnut and Antique Linen).

I created an embellishment by adding white Graphmaster acrylic paint pen on a pine branch die-cuts (Impression Obsession) before applying glue and a generous sprinkle of white flock plus a tiny amount of white glitter a on top. Some die cut berries (I believe a Memory Box die) from vellum pass as mistletoe berries.

I hope you like my nature inspired Christmas card and  you will join us at Country View Challenges for the chance to win a £20 voucher.

Thanks for coming by,
I am entering the SSS Wednesday, and That's Crafty challenges.