' ' ' 'Crafty Endeavours: July 2020

Sunday, 26 July 2020

Christmas in July

Christmas in July is a popular theme in crafting circles and, as it happens, July is also World Watercolour Month so I decided to join in with a watercolour snowy scene to keep us cool...
 

All the stamps are by Crafty Individuals.

I first painted the sky with a brush and watercolour paints.

The bird (CI-507) was stamped next, using a mix of watercolour pencils on the rubber sprayed with water. I sprayed the paper too so that a little colour seeps around the body of the bird as if it's moving.

I masked the bird and stamped the trees (all from CI-450) with grey ink, dry-ish black ink (my old Memento pad), and using my fresh Memento black inkpad for the foreground tree.

With all the elements in place I added hills, snowdrifts and blades of grass peeping from the snow.

Thanks for coming by,
I am entering the Stamping SensationsLost Coast Designs and  Vintage Journey challenges.

Tuesday, 21 July 2020

Pushing the Dandelions

Today I have another make for the Country View Challenge where the theme is "Do More Of What Makes You Happy", chosen by Sue. So use your happy colours, favourite stamps etc..

This turned out completely different to what I had planned... As I love scenescapes, I was going to ink my way through a classic whimsical landscape in the Lavinia style with my new stamps.
After a number of false starts I have ended up with an alcohol ink background and my old favourite Lavinia stamps. Still, also something that makes me happy...


I made the background by spreading alcohol inks on a piece of plastic (you can use yupo, metal or any kind of non absorbent substrate) as my "palette" and used alcohol lift ink and an oval polymer plate to lift the colours and transfer on my white card.

I stamped all 3 flowers from the Dandelions set  in black Versafine, curving the stalks as I wished and added the faerie (Mia isn't in stock at the moment but there are plenty of other fairies here).

For finishing touches, I added a piece of paper lace coloured with Oxide Distress inks in Walnut, a flower die-cut (X-cut Trim Borders) and a die-cut sentiment (All occasion Dies).

You still have 10 days to link to our Country View challenge, plenty of time to do something that makes you happy, and maybe win a £20 voucher which will definitely make you happy...

Thanks for coming by,

Friday, 17 July 2020

She

Hello a special post today as I am showing a make with a new STAMPlorations product. The CRAFTplorations line has now laser cut embellishments in MDF, chipboard and Baltic birch (see this introduction post here).


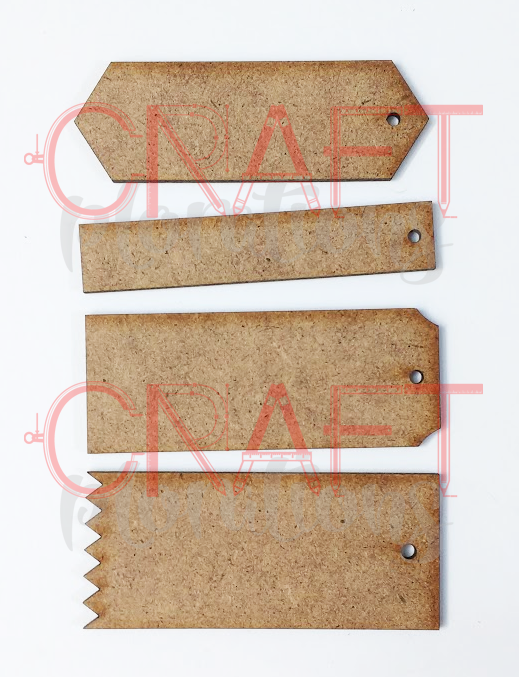
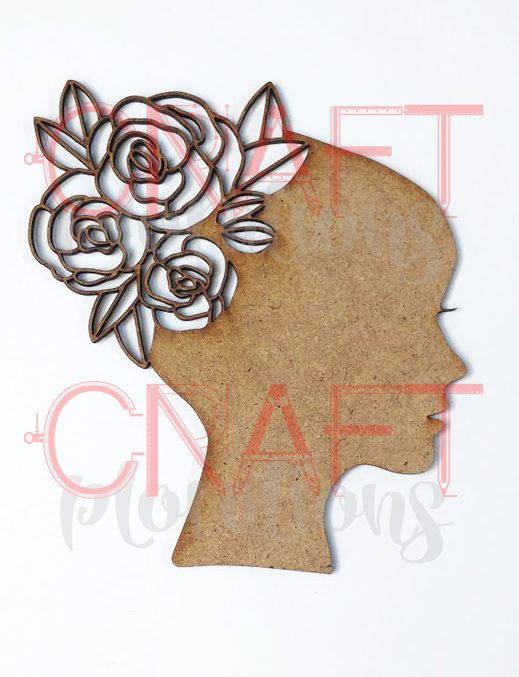
I received a few samples to road test and this is the first project I made, a display sign to put on a princess' bedroom door. I used the Beautiful Silhouette and one of the Mini Rectangle Tags.

I first gessoed both MDF pieces, the tag with white gesso and the silhouette in both black for the face and white for the flowers.


I then applied crackle medium to the face and painted over with a
flesh colour of acrylic paint.


For the flowers and leaves I kept it simple and added colour with Inktense blocks, sprayed with water and used my fingers to spread. Finally I added a bit of black pen for the eyelashes.

I spelled SHE with bubbles alpha on the tag, origins unknown (very old).

For my base I chose to use a piece of thin wood, recycled from a food container to continue the theme. I wondered if it could be embossed with a folder and the answer is yes, although to avoid breaking the fragile wood it is important to add shims progressively.
Here I used  the Sizzix/Tim Holtz 3D Lumber folder and I finished with a light application of Distress ink to highlight the wood grain texture.

Ironic that I used embossing and ink on real wood isn't it....


Working with the MDF is a real joy as it is both very light and very smooth but so much sturdier than paper!

Don't forget to comment here and on the STAMPlorations blog for the chance to win the Beautiful silhouette in 1.5mm mdf !

***
Whenever you shop for STAMPlorations products you can get 20% off with my code: STAMPGIRLCRAFTY
***


Thanks for coming by,
I am entering the SSS Wednesday challenge.

 
Note: I couldn't find my regular crackle medium and I used this Docrafts one which a lot of people, including myself, have had trouble with. As you can see, this time it worked and the recipe for success is, I believe, to apply thick layers of both the crackle medium and the paint. The paint also needs to be sufficiently fluid so it can be applied quickly, with as few brush strokes as possible, as that tends to disturb the crackling.

Saturday, 11 July 2020

Fragile wings

This is this stamp first outing (Crafty Individual CI- 521) and I was determined to stamp it in colours, however cumbersome it was. I can report it is a bit delicate and time consuming but I did get the required result.


I used a combination of black ink and Versamark ink to stamp and used pastel (chalks) to apply colour on the flower and script. I used coloured pencils for the butterfly.
Apologies for the photo but I had great difficulties taking good pictures without colour casts, so here's a different one:

  
It's one of these images that fill up a card so I didn't add anything to avoid hiding any of its beauty (and my hard work!). I hope you like it!

Thanks for coming by,
I am entering the Allsorts (my B is of course Butterfly) and Stamping Sensations  challenges.

Wednesday, 1 July 2020

Experimenting with alcohol


This should be treat for everyone... My team mate Sue has chosen "Do More Of What Makes You Happy" as the theme of our Country View Challenge this month so all you have to do is use your happy colours, favourite stamps etc..

My faithful readers will know I am a bit of a technique junkie and will not be surprised that, for my first make, I chose to test a new one for me: Gelli printing with alcohol inks. Yes, trying new things makes me happy!!!

As this was a bit of an experiment and I had to work quickly before the inks dried I didn't take any photos but no fear my method is inspired by a video from Barbara Grey who can explain better the process! But in a nutshell, this is what I did:

1. I applied alcohol inks on the plate, added a bit of alcohol, spread the colour with a brayer and placed my stencil on top.
2. With Archival ink and the felt tool I applied colour through the stencil.
3.  removed the stencil, let dry the inks a few minutes and brayered some white acrylic paint on top, then lifted my print with a piece of card.
4.Optionally you can use the alcohol ink remaining on the stencil to create one or more prints by reviving the dried up inks with sprayed alcohol (NOT blending solution).

I managed to get a few interesting backgrounds and some not so great but it is a fun technique. The alcohol inks haven't stained my Gelli Plate except for the yellow (Lemonade), not the end of the world as it is a light colour.

I didn't want to hide the background, which I see as a view over a coastal town surrounded by hills, so I just added some birds (I re-positioned the stencil for that) and the sentiment which I embossed in Midnight Blue.


Supplies:
Ranger Alcohol inks
Archival Mini inks pads Kit 4
Visible Image Strobes stencil
Visible image Where the Dreams take you stamp set
Visible Image Ahead Of Our Time stamp set (the birds)
Versamark Inkpad
Midnight Blue Embossing powder

Over to you now, have a look at what the DT made on the Country View Challenge blog and link up your project to the challenge for the chance to win a £20 voucher for the Country View Craft shop.


Thanks for coming by,
I am entering the SSS Wednesday, Paperbabe, We Love To Create  challenges.