' ' ' 'Crafty Endeavours: November 2017

Thursday 30 November 2017

X-mas wrapped up

So I have the cards, the next item on my crafting to-do list is the wrapping. I may yet create some wrapping paper, I have done so in the past, but today I'm looking at making bags in the quickest way so that I have a template for last minute wrapping panic (been there, done that).

If you want to read my step by step for not just 1 but 2 kind of bags you will have to hop on to the Craft Barn blog.


Supplies:
Woodware clear stamp: Huge Snowflake
Embossing powders: Cosmic Shimmer Brilliant Sparkle in Gold, Sea Glass (Wow), Frantage Aged rose, Clear
Paper Artsy Fresco paints
Andy Skinner's Sunburst and Imagination Crafts Drop Screen
Inks: black Versafine, Brilliance Starlight silver, gold
Envelopes, mirror card.

Hope you like my bags!
I am entering the SSS Wednesday and Rubbernecker challenge.

Wednesday 29 November 2017

Stencil blog hop

Welcome to the Stamplorations Stencil Blog Hop! 8 new designs by Sanna Lippert have been released and will be showcased along the hop.


https://stamplorations.blogspot.com/2017/11/stencil-blog-hop-with-sanna-lippert-designs.html

First up, a colourful card where I made my own "patterned paper" with the ARTplorations Leaves 2 stencil.


I took a bit of texture paste, coloured it with acrylic paint and applied with a painting knife through the Leaves 2 stencil.


For more interest and dimension, I then covered the paste with Wow embossing powder in Olive. Before using the heat gun, the paste must be dry!

I cut a piece of pink hand made paper with 2 of the Stitched Snow Hills dies and added my sentiment from the Fond Expressions 2 stamp set.


For my second project, I played with my Gelli plate to create a distressed background.


I applied a first layer of blue paint and placed a piece of canvas on top to create texture.
I spread a second layer of paint with pinks and lavender on top of the DRIED blue layer and placed the Flowers 2 stencil over the plate.
Immediately, using a scrap piece of paper, I removed paint through the stencil.
When the second layer had dried I applied a final layer of paint, in a deep Lavender shade, and lifted my print, which pulls up all of the dried layers together.
This is what I obtained:

I wasn't happy with the lack of contrast between the stencil motif and the rest of the print, so I started again this time with an orange colour instead of the pink (I didn't take pictures but followed the same process). The stencilled motifs were barely visible so I added stencilling directly on the print.

I cut a piece of the print to fit my card base and added double sided adhesive around all around to create an embossed "frame" with Wow! Grape embossing powder.

My focal image is using the top 3 petals of the Flowers 2 stencil motif and the stem and leaves of the Leaves motif. I used Pan Pastel for the petals and Distress Oxides inks for the green. It is matted on the smallest die from the Crazy Double Running Stitch set.

**********
 
You have until the 4th of December to join us on the Stamplorations Stencil Blog Hop and leave comments for a chance to win prizes.
Winners will be randomly drawn from comments left on the STAMPlorations blog and participating designers blogs. There will be 1 winner of $20 gift certificate and 2 winners of their choice of 3 Sanna Lippert Designs stencils.

Have fun hopping!
I am entering both cards in the SSS Wednesday and Polkadoodles challenges.


Sunday 19 November 2017

On the road again

Welcome to my second inspiration piece for the Country View Challenge, where the theme chosen by Gabrielle is Stencils.

And I'm still travelling... this time with a Vintage tag:


I first blended 4 colours of Distress Oxides on a manilla tag.

Then I sprayed water through 2 stencils:

The wall stencil is difficult to see but you should be able to glimpse the woodgrain. Not that it matters, since it is totally obscured in the finished tag!

Now a bit of background stamping with the Scripted Streets by Visible Image.

Then, I used a DIY stencil (made with a Papertrey Ink Cover plate die) with transparent texture paste. After drying, I re-applied more D.O on top to show up the stencilled hexagons.

A piece of netting die-cut, corners and lace scraps serve as mat for the vintage image by Crafty Individuals (this is NOT a stamp).

I had a bit of "white" space left and I thought it was crying out for one of the Adventure Words from the Sizzix Thinlit die set, and more  hexagons (die-cut from cork sheet) so I obliged...

Your turn to pull out your stencils, there's still plenty of time to enter our Country View Challenge. If you do, you could win a £20 voucher!

Thanks for coming by,
Also entering the Creative Artiste, That's Crafty, and We Love To Create challenges.

Friday 17 November 2017

A card and a bonus tag

Welcome to my second inspiration post for the Stamplorations Theme and Sketch challenge.

Bear in mind that to enter the challenge you can choose to follow either the sketch, or the theme:


I made card following the sketch and a tag that follows both the theme and the sketch.


For the card, I stamped the bird from the Trendy Birds 2 stamp set with Distress Oxides inks in Salty Ocean and Wilted Violet. I then used the mask from the ARTplorations Stencil Some Birds
to protect the bird when I stamped the leaves from the Trendy Leaves set with Versamark.
I took the mask off and used Wow Embossing powder in Fairy Tale, which is a gold with holographic glitter.

The sentiment is from the same Trendy Birds 2 set and has been embossed in white.


The glint and multi coloured reflections of the embossing powder are hard to capture on film but here goes:

On my left it looks blue... and
on my right, it looks green...

Beautiful in natural light!


For the tag, I stamped and embossed a flower from Dee's Artsy Impressions - Smile set  and masked it with masking fluid (liquid frisket, rubber cement or similar).

Using the Retro Circles stencil I applied Distress Glaze to create a resist before spraying with water and sprinkling powders on top (Brushos). When dry, I removed the masking fluid to reveal the flowers and stamped the sentiment from the Shery Russ Designs - Fond Expressions 2 stamps set.

You still have time to enter the Theme and Sketch challenge so hop on over to the Stamplorations blog to get more inspiration from the DT. Your make only need to follow either the Sketch or the theme and there are lovely prizes to win...

Thanks for coming by,
Also entering the The Artistic Stamper, That's Crafty and Craft Stamper TIMI challenges.


Thursday 16 November 2017

Winter birthdays

Spare a thought for those December babies... forever overshadowed by that most famous of babies and somewhat neglected when it comes to their birthday. Some can feel quite prickly about it.... (no names here but I know someone very close, ahem, in that case).
With this in mind I designed this birthday card especially for the December born.


Supplies:
Succulents stamp set: Craft Emotions stamps
Starlight paints - Imagination Crafts
Brilliance inks
Glitter card - Art-C
Water soluble pencils: Derwent
Enamel accents Ranger

Hop on over to the Craft Barn blog to read my set by step.

Thanks for coming by,
I am entering the Craft Stamper TIMIPenny Black and more, Fashionable Stamping, We Love To Create, Creative Artist challenges.

Wednesday 15 November 2017

Giving Thanks blog hop

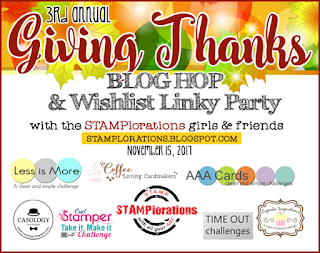
To celebrate Thanksgiving, Stamplorations have organised their 3rd Annual Giving Thanks blog hop and you're all invited to join! Plus, you can link your Stamplorations products wishlist for a chance to win it, the Wish List Linky party kicked off Monday.

Giving Thanks blog hop
 
There are 35 participating designers all in all in the hop (complete list below) -- with 8 talented guest designers from the various challenge blogs that STAMPlorations has had the privilege to sponsor in the last year.
 
 This is a long post, but well worth getting to the end if you like Stamplorations  designs and a BARGAIN...
 
********

Although Thanksgiving is a uniquely US celebration, I decided to make a card on the theme anyway, as I have wonderful memories of a Thanksgiving dinner where orphaned lost souls, be it foreigners like me or just too far from home, gathered for a traditional turkey dinner.
I can't remember if pumpkins were involved, but hey they bring a little bit of sunshine with their vibrant orange hues in an otherwise grey November...


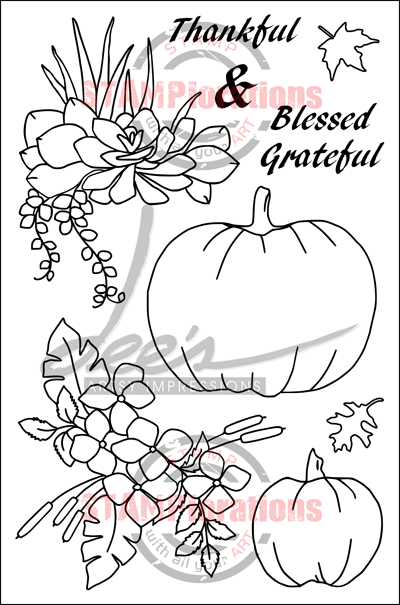
I stamped the small pumpkins from the newly released Thankful & Blessed onto yellow cardstock with Distress Oxide in Fossilized Amber, coloured them with pencils and fussy cut them.

The big pumpkin, from the same set, was stamped on ivory card with yellow die ink. For the colouring I first applied watercolour pencils dry and then used the brush to dissolve the paint.

To anchor my pumpkins I added shading with pencils and a few leaves, stamped and coloured.
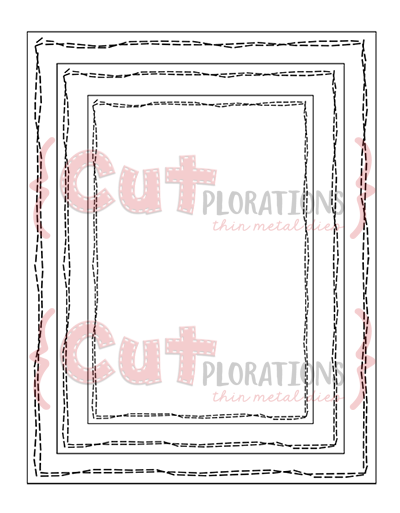
The big pumpkin is sandwiched between 2 pieces of card cut with the Stitched Snow Hills dies.

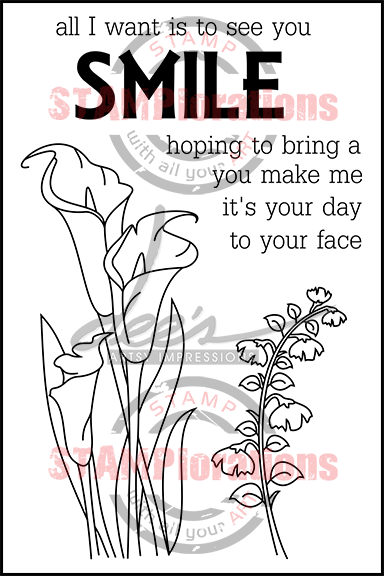
I embossed the sentiment, also from the Thankful & Blessed, with Wow EP in Fairy Tale, you can see the glint of the glitters reflecting off the base!

I am entering my pumpkins in the Fashionable Stamping challenge.

****************

When Thanksgiving is all over, or if you don't celebrate it where you live, you can still use the pumpkins, which at the stroke of midnight turn into... flowers!


I stamped and embossed the small pumpkins with Sea Glass EP from Wow! on a piece of leftover masterboard and fussy cut them. I added a stalk by die-cutting twice another piece of Masterboard with the ever useful Stitched Snow Hills die. The center of the flower has been filled with Ranger Enamel Accent.
I pulled out some old paper with inclusions (they were all the rage moons ago) to use as a mat for my flower, and completed with a sentiment from the Thankful & Blessed stamp set.

I am entering the Pumpkin Flower in the Penny Black and more challenge
********

Don't delay and start hopping... You have until the end of the month to leave comments and link up a project or two of your own. There are prizes to be won for linking projects, commenting along the hop and also on Facebook and Instagram, as well as the chance to win your Stamplorations wishlist.  You'll find all the details here.
 
And if you're not one of the lucky winners.... Shery has thought of you too, with a fab Thanksgiving Sales:
 
Stamplorations


* If you do order,  mention in the notes section of the order, that Craftyfield sent you there for a free word die (up to $10) of your choice. This is an offer you can't pass up ladies... *

You should have arrived here from Carol and your next stop is : Kathy. If you get lost, the full list of participants is below.

Enjoy the hop!

Both cards are entering the SSS Monday challenge.


Friday 10 November 2017

X-mass production

Yes, it's that time of the year again, when we crafters REALLY need to knuckle down and produce, en masse, those Christmas cards!

Today, I have chosen a design going to the heart of the matter, with a simple Merry Christmas sentiment die-cut as the focal point of an otherwise very simple card.


Come by the Craft Barn blog to read my step by step, this is a quick one, which I hope will come in handy for your Christmas makes.

Thanks for coming by,
I am entering the SSS Wednesday Challenge,  challenges.

Monday 6 November 2017

Christmas Tags

In what is becoming an annual event I have been making my "rubbish" tags again....


As you can see they are all different, which is not ideal for mass making but is an excellent way of using up some scraps, rather than binning them.... hence the "Rubbish" tag moniker!


Deer tag:

Creative Expressions Warped Circles Stencils
D. Oxides in Picked Raspberry and Twisted Citron
Memory Box Deer die-cut
Scrap of foiled cardstock.
Versafine ink
Wow Embossing powder in Fairy Tale


X-mas tree:

Crafter's Companion Pearlescent patterned cardstock
Memory box Christmas tree die
Green Distress and pigment inks
Wow Embossing powder in Fairy Tale
Die'sire Merry Christmas die

Butterfly tag:
Gelli print with Starlight paints
TCW Mini Specimen stencil (TCW454S)
Grunge paste tinted with acrylic paint
Versafine ink
Clear EP
Stamp from my own collection

Branches tag:

MFT Snowfall Stencils
Branches Die-cut
Prima Heavy Gesso
Graphmaster acrylic paint marker
Merry Christmas stamp (Freebie from magazine)
Versamark
White EP
Signpost Tag :

Gloss paper and Ranger alcohol inks
Spellbinders Victorian Signpost S2-177 die
White embossing powder
Merry Christmas stamp (freebie from magazine)

The light conditions are so difficult at this time of the year I photographed all my tags in direct sunlight to show the shine and also in the shade to give a better idea of the colours, especially for the very shiny Butterfly and Signpost tags.

Let me know what you think!

I am entering the following challenges: Addicted to stamps, SSS Wednesday Challenge, Paperbabe, WOW Embossing powders and Vintage Journey (I don't know about marvels but all my tags are indeed less than 4").