' ' ' 'Crafty Endeavours: March 2015

Thursday 26 March 2015

Hello again!

Apologies for posting so many times this week but I have been slow in finishing the projects I had intended to link!

So before the That's Crafty challenge closes here's my "Things with wings". They are butterflies of course, since they are a favourite of mine, as I find them easy to use on cards. Men, woman and children, everyone loves butterflies!.

I first stamped my butterflies (from an old Docrafts set) with Distress inks sprayed with water and over stamped in black Versafine but slightly offset. The concept was to show an after image of the butterflies as they are flying across my page. The Distress inks I chose were a bit too pale to show well though...


I used watercolour pencils and a brush to colour them and splattered some watercolour as well for a "trail".

Keeping it simple and almost clean I just added a sentiment stamped on a die-cut and framed with 2 pieces of "waste" die-cut.

Thanks for coming by,

Also entering the Lisa.B.DesignsUniko Studio challenge where I picked up the sketch for my card, and Bunny Zoe's Crafts challenges.

Wednesday 25 March 2015

Late for my train

A quick post to show you this make I am entering in the Katzelkraft and Craft Barn challenges. I nearly didn't make it in the case of Katzelkraft, since the theme of "Surprise us" didn't spark any ideas. Finally, I decided to do something I had been meaning to do for a long time, stamping the very detailed train stamp from the Katzelkraft Transportation set in colours. I do hope it's a surprise as these engraving type stamps are usually seen all in black.

The Craft Barn was all about Brushos this week so I used them on this make but in a more controlled manner and effectively, although I didn't brush the colour in, as watercolours.


Un post en vitesse pour vous montrer cette réa pour participer aux challenges Katzelkraft et Craft Barn. J'ai presque manqué Katzelkraft, car le thème "Surprenez nous" m'a laissé perplexe. En fin de compte, j'ai décidé de faire quelque chose que j'avais envie de faire depuis longtemps: utiliser le tampon train du set Katzelkraft Transportation avec des encres de couleur. J'espère que cela étonnera puisque ces images de gravures anciennes sont habituellement tamponnées tout en noir.

Le Craft Barn se concentrait sur les Brushos cette semaine donc je les aie utilisées à nouveau, mais d'une façon plus retenue et en fait comme de l'aquarelle, même si je ne les ai pas appliquées au  pinceau.

Merci de votre visite,
Thanks for coming by,

Monday 23 March 2015

Bows and Blossoms

I had the perfect vintage photo of this little girl with an enormous bow and decided shabby chic would be the most sympathetic treatment I could give it. And although I love this style, I find it incredibly difficult so I thought this would be a good time to try and improve!

I framed my image with a Dandelion head (Lavinia stamps set) inked with pens, added some heart gems and fabric flowers and affixed the panel with 3D pads. The clear stamp is easy to mould into a curve on the acrylic block to give it the shape you want.


The papers are designed by Melissa Frances, as is the lace. I added a doily and a ribbon bow, since this photo is all about the bow!

I feel I am several layers short of shabby but I wracked my brain and couldn't come up with anything. It's like working against the grain... for some reason I can't do it.
Try and try again...
Penny Black and moreChallenges : Lavinia Stamps, Live and Love Crafts
and Penny Black and more

Saturday 21 March 2015

Finnabair inspired tag

Artful Times wants us to create a tag with pocket this fortnight, which I thought was a good idea, and also a good opportunity to play with some Prima/Finnabair supplies...

I had to make a big tag (roughly 25x11cms) as the stamp I'd planned to use is quite big.

I stamped the "Trust the magic" image in Versafine and masked it before stamping the doily circle from the same set and embossing in clear powder. I also applied translucent paste through a stencil (Crafter's Workshop).

I sprayed some blue, lime green and pink micas sprays all around my image. The blue is a Prima Bloom spray in cobalt blue. I wouldn't normally spend as much on a spray but I was curious about the sprayer mechanism itself. I have to admit it's really good, it sprays far and wide (beware) which is great for layouts and one spray will deliver enough colour to cover but not soak the paper, unlike all my other mists.
Needless to say I wish I had some more and the latest colours released are gorgeous! As to refilling the bottle once or twice as per Prima's tips, I am not convinced and will test at some point.


I added some Moss Green Brusho powder around my image to evoke blooming vegetation since this is a spring tag and Finnabair (the one on the stamp, that is) already looks like she is springing out of flowers...

When all this was dry and flat I added a piece of vellum to make my pocket and filled it with small tags.

I made a flower using several layers of stamped tissue paper, die-cut in 3 different sizes with the Peony Nestabilities, sprayed with a pink mica spray and scrunched up around a very small brad.

Hope you like my tag as much as I enjoyed making it!Entering the Wow Embossing powder, Craft BarnA Sprinkle of Imagination and Craft Stamper challenges.

Monday 16 March 2015

A simple pear

Another make on the theme of spring, or rather the colours of spring as my chosen stamp is decidedly unseasonal, at least in the northern hemisphere!

For March the Rubber Dance challenge us to use the following colour scheme:


I stamped the Pear first and masked it before sprinkling Brushos in yellow, orange and moss green. Granted the Moss green is on the brownish side, it dissolves in flashes of green, brown and purple grains as you can see in the lower right corner.
Things went awry when I added water to the card and the background was nearly a write off. The card I used didn't like the water one bit...  my fault really, I should have used watercolour paper. I carried on because I wanted to make sure my design worked but in the end I liked the effect so I went with it.
After drying I stamped the Diamonds background, the leaf, the Art definition inked with pens and the quote inked with Versafine Onyx black.

I coloured the pear with Coloursoft pencils.

I did think of adding twine, buttons etc... but I couldn't bear to hide any of it! Hey ho Simplicity is the ultimate sophistication, someone said...


Also entering Craft Stamper and Country View Crafts Anything goes challenges.

Sunday 15 March 2015

Inspired by Deco Patch

This week's Craft Barn  challenge is to cover something with a Deco Patch type paper.
Last year I gave a makeover to a cheap glasses case to give to my OH (you can see it here) and the closure mechanism broke last week so I needed to do another one.


I created my paper with a white tissue paper and stamps. On one side the London cityscape and London name is from a set by the Artistic Stamper, on the back are some Street names from a Paper Artsy set and Big Ben comes from a set by Rubber Dance.
 
I glued my paper in place with Mod Podge over my gessoed case and applied Fresco paint (Blueberry) everywhere but the cityscape, where I only applied a wash of orange to evoke the London night glow.

I finished by several coats of Paper Artsy matt glaze.
I'm crossing my fingers he doesn't break that one too soon...


Other challenge: Pan Pastels UK

Friday 13 March 2015

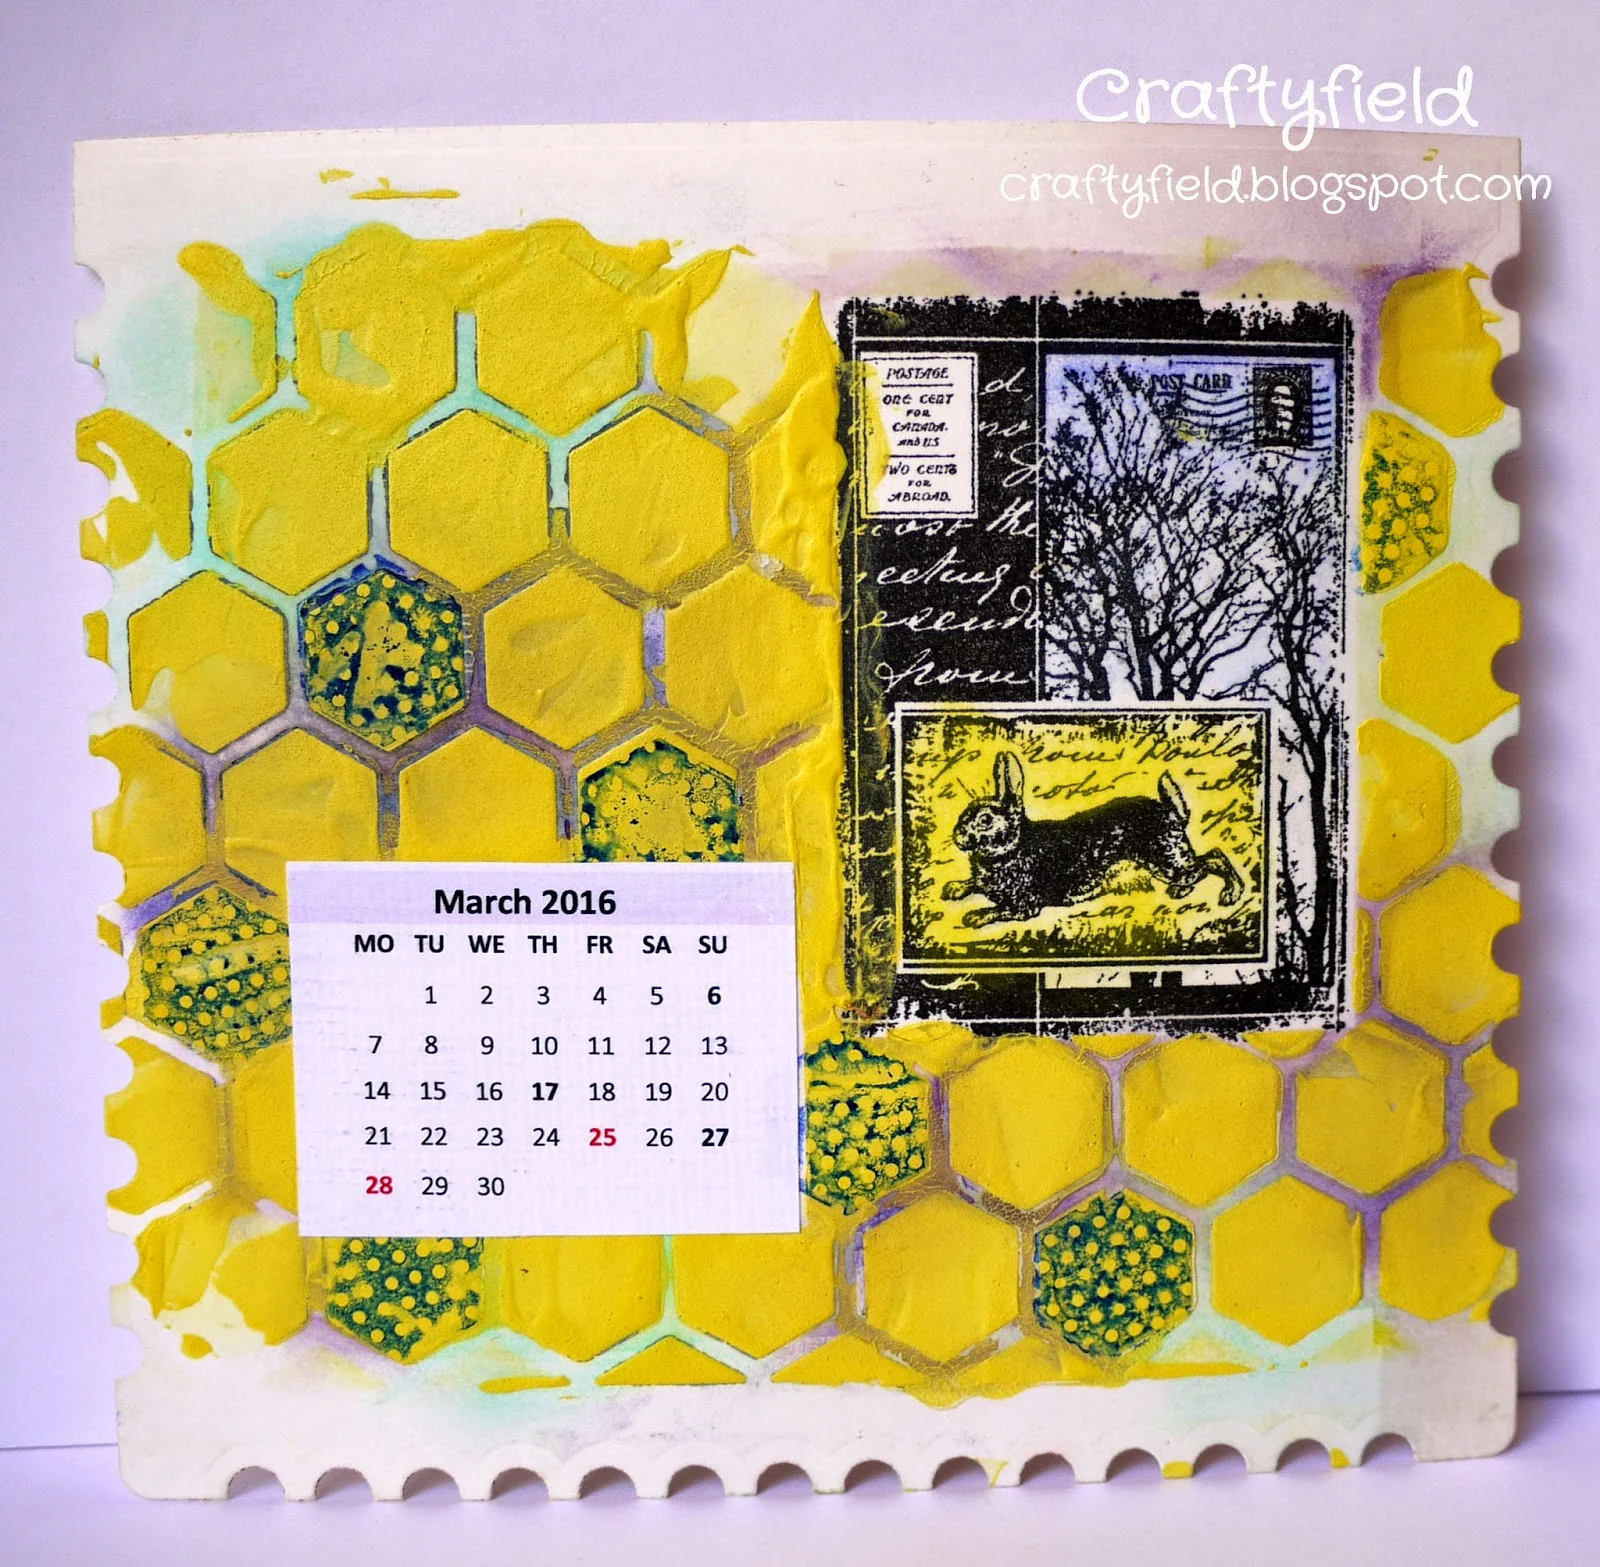
March rabbit

Time for a new page in my calendar. The colour is yellow and the word rabbit, given by the Craft Barn. No token smudge of yellow here, I take the challenge seriously. And yellow is sooooo not my colour, it hurts my eyes looking at it now!


I started my background with applying yellow pastel over Versamark with an Hexagon stencil. The idea was to apply some blues and violets to the negative space but as the pastel spread to the yellow bits I had to rethink...
For my second attempt I used a mix of texture paste and yellow paint through the stencil and when dry used distress inks for the recesses.

The image is from Crafty Individuals (CI-202), coloured with pastels.

In the end I decided to overstamp the hexagons with a dotty motif just to knock back that expanse of yellow, using a Pitt big brush pen in Indigo.

I am also entering the Pan Pastel UK challenge.

Thanks for coming by,

Sunday 8 March 2015

Birds in the wood

Artful Times want to see birds on our creation so this was the starting inspiration for this piece.


I selected my Birds from the Crafty Individuals stamp set CI-329 and set out to create a wood background with Brushos and  Imagination Crafts Nature set mica powders trying to match Brushos and mica, colour for colour, as I dropped them on the wet water colour paper. Sadly the shine doesn't show in the main picture so here's a snippet with a better light:


I added a path (Lavinia) and some grasses (Flonzcraft) to complete the impression of a path in the woods.

I want to make this into a card but I'm not sure what colour to use as a card base so any suggestion welcomed!

Thanks for coming by,
Also entering the Country View Crafts Anything goes and
Imagination Crafts challenges.

Monday 2 March 2015

Olde Worlde


Welcome to the new challenge at Vintage Stamping Challenges where I chose this month's theme, Olde Worlde. Think Victorian era, chocolate box houses or villages, engravings, Steampunk... any thing older than a century!

I pulled my Flonzcraft True Gentleman set and stamped the "older" of the 2 gentlemen with Versafine as well as the top hats, for which I'd prepared a mask, on a piece of ivory cardstock. I tore and distressed the panel before affixing to a brown mat.


For the background I started with a piece of patterned paper which I inked with various distress inks, a piece of baking parchment (loooong story) embossed with a folder and wet embossed (Walnut stain ink + Frost embossing powder).
I added a border made with textured paper which I coloured with Walnut Distress ink and added 2 screw-shaped brads.

For embellishments, as my faithful readers will know, I love to make my own, so I created a "seal" using a postmark stamp and gold wax adding it over some multi-coloured threads.

 
I created a metal frame for my silhouette portrait also from the True Gentleman set.


I am enjoying this set very much and I find it invaluable for those difficult masculine cards!

Hope I have inspired you to join us! You don't normally need to create a vintage project but this month vintage is definitely an option considering the theme! Remember that you DO have to include stamping - no digis allowed. Our lucky winner will receive a fab prize of a $20 voucher from Flonzcraft so don't miss out on your chance to win!

Go on and hop on over to the Vintage Stamping Challenges blog and see all the DT’s work for more inspiration.


Challenge : Stamping Sensations


Sunday 1 March 2015

Spring Greens

This is a fairly simple, although not quite clean!, card which I made because I fancied playing with Brushos.


I used IndigoBlu's Flutterby Dinkie stamp, coloured with alcohol markers and masked the image before splattering water and Brushos in Leaf Green, Emerald Green and Yellow. I used yellow because the Emerald Green is rather blue!

Hope you'll like this card!
WedodoobadooChallenges: IndigoBlu, Country View Crafts Anything goes and Wedodoobadoo