
Tuesday, 30 October 2018
Friday, 19 October 2018
Born to roam
I am back with a bonus piece for the Stamplorations Theme & Sketch challenge. If you missed my first post, the theme and sketch are:


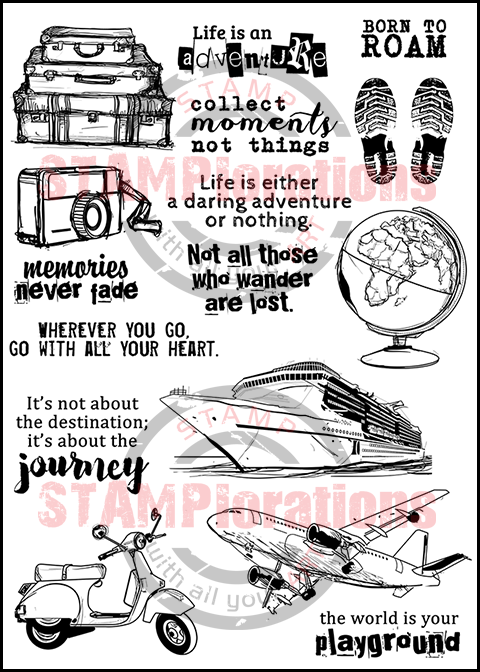
I made a tag following the sketch only, using the Born to Roam stamp set.
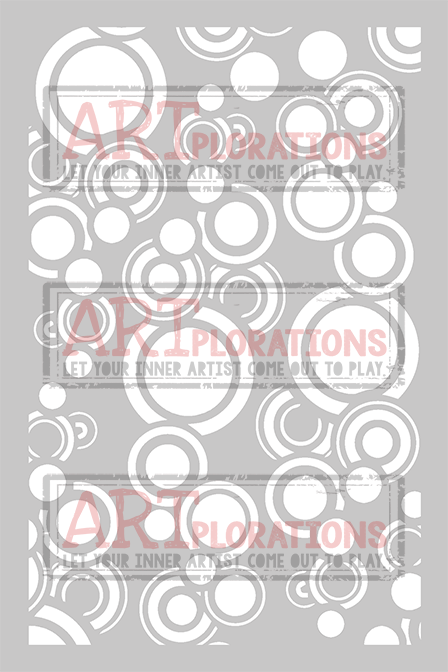
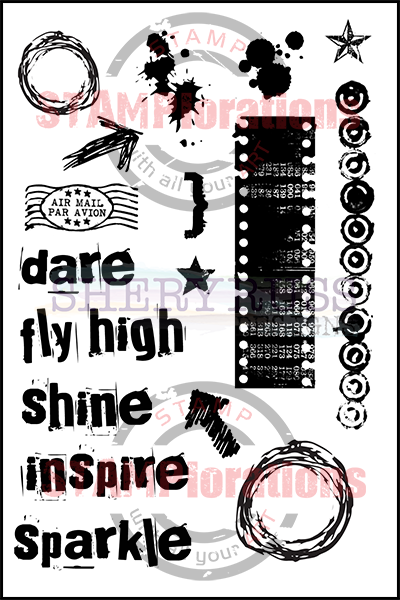
 First I applied Distress inks in Scattered straw, Carved Pumpkin and Red Brick to a manilla tag and sprayed some water over the Retro Circles stencil. For added interest in the background I stamped, with the same colours of Distress inks, motifs from the Art Marks stamp set.
Then I simply stamped the footprints along the curve of the sketch, the globe and a sentiment from the Born to Roam stamp set in black ink. A bit of liquid glass on the globe, a doodled border and some twine finish the tag.
Come by the Stamplorations blog for more inspiration for this month's challenge from the Design Team.
Thanks for coming by,
 I am entering the Unikostudio and Stamping Sensations challenges.

I made a tag following the sketch only, using the Born to Roam stamp set.

Then I simply stamped the footprints along the curve of the sketch, the globe and a sentiment from the Born to Roam stamp set in black ink. A bit of liquid glass on the globe, a doodled border and some twine finish the tag.
Come by the Stamplorations blog for more inspiration for this month's challenge from the Design Team.
Whenever you shop for STAMPlorations products you can get 20% off with my code: STAMPGIRLCRAFTY
Thanks for coming by,
I am entering the Unikostudio and Stamping Sensations challenges.
Thursday, 18 October 2018
Rainbow and butterflies
Join us today on the STAMPlorations blog for a tribute to Melissa Lane, who sadly passed away and is leaving a big hole in her family and all who knew her, including our Crafting community.
She loved butterflies and if you'd like to contribute, whether you knew Melissa in real life or just online, you will be able to add your butterfly makes on the blog.

She loved butterflies and if you'd like to contribute, whether you knew Melissa in real life or just online, you will be able to add your butterfly makes on the blog.

Monday, 15 October 2018
Embossing and watercolours
This month the Craft U Love Design Team has been given the same stamp set to work with, one of the new stamp sets designed by Julie Hickey, Garden Treasures. It will be exciting to compare how different or similar our take will be...

I meant to take photos as I went along but as I used a wet-on-wet watercolour technique, it wasn't possible.

My first step was to stamp and emboss in white some of the flowers and leaves, I am enclosing this photo so you can see the stamp set but alas the embossing is not visible!
The next picture show the card as I just finished applying the colours, still wet and a bit shiny from the water.

Eagled eye crafters will notice the finished panel is different because I decided to do it again as the sentiment wasn't standing out well enough after drying.
To paint the background I first applied water all over and with a brush loaded with a strong mix touched the areas on and around the embossing. If the paint dries too quickly, a spritz or two of fine mist helps to keep it workable and it is possible to push the pigment to your liking.
Of course the same technique can be used with powders, acrylic inks or paints each giving a slightly different look.
Supplies:
Julie Hickey Designs Stamp Set - Garden Treasures
WaterArt Watercolour A6 Paper Pack
Tonic Studios Nuvo Light Mist Spray Bottles
My teamies makes will be shown on Facebook here during the day.
Should you purchase any of the products I have used on this card, select 'Design Team' in the 'where have you seen us' drop down so we know we have inspired you!
Thanks for coming by,
Saturday, 13 October 2018
Mini scrapbook album
I have a photo heavy post for you today, showing a mini album created with a single 12x12 sheet of designer paper which doubles up as a (special) Birthday card.

The front cover is stamped with an image from the Art Nouveau Silhouettes stamp set from Flonzcraft and I added a title with die-cut letters to which I applied gilding flakes.
 On the first page I placed some photos and added stamped motifs (Katzelkraft, Prima and more).
 Page 2 feature stamps from the Sew Sweet Stamp Set by Rubber Dance and an embossed corner with some Stampendous Frantage powder (the stamp is a CAC by Impression Obsession)
 On page 3 more Rubber Dance stamps from the Retro Beach set, some embossed in Wow Vanilla powder
 Page 4 uses stamps from Katzelkraft Paris Monuments and Paris Notre Dame sets.

Finally the back cover is adorned with another silhouette from the Art Nouveau Silhouettes stamp set from Flonzcraft.
Pure stamping pleasure and a lot of ink, although the background is patterned paper. To read up on how to make these types of book , you can look here for a tutorial. This has to be one of the easiest album to make, as it only need a few folds and one cut! Since this paper was single sided I added a cover from another piece of paper and a spine too. The construction allows for pockets if you want and I placed a tag in mine, bearing my birthday message for the recipient.
Thanks for coming by,

The front cover is stamped with an image from the Art Nouveau Silhouettes stamp set from Flonzcraft and I added a title with die-cut letters to which I applied gilding flakes.


Finally the back cover is adorned with another silhouette from the Art Nouveau Silhouettes stamp set from Flonzcraft.
Pure stamping pleasure and a lot of ink, although the background is patterned paper. To read up on how to make these types of book , you can look here for a tutorial. This has to be one of the easiest album to make, as it only need a few folds and one cut! Since this paper was single sided I added a cover from another piece of paper and a spine too. The construction allows for pockets if you want and I placed a tag in mine, bearing my birthday message for the recipient.
Thanks for coming by,
I am entering the Mini Album Makers, The Artistic Stamper, SSS Wednesday Challenge and Paperbabe Stamps challenges.


Sunday, 7 October 2018
Plant life
Welcome to my second inspiration post for our Country View Challenge, hosted by teamie Rachel on the theme "Plant-astic".
For this one I played with powders, it's always fun if unpredictable...

For this one I played with powders, it's always fun if unpredictable...

Friday, 5 October 2018
The first Autumn leaves
Welcome come back to the Stamplorations Theme & Sketch challenge after our summer break. This October our Theme and Sketch are:
Monday, 1 October 2018
Changing seasons
Autumn is back with its fiery leaves, a perfect association with our October Plant-astic theme at Country View Challenges!


Subscribe to:
Posts (Atom)