Showing posts with label Card. Show all posts

Tuesday, 4 August 2026

Movin' Up and Flipping Houses

Hello crafters, 

Today I have more inspiration for the Whimsical Homes ATCs from STAMPlorations.

First up a new house card:
The idea is that the new house is bigger and better as the family grows (wishful thinking on my part).
The loosely coloured background has been created with Distress inks for a subtle cloud effect as the home moves up in the sky .

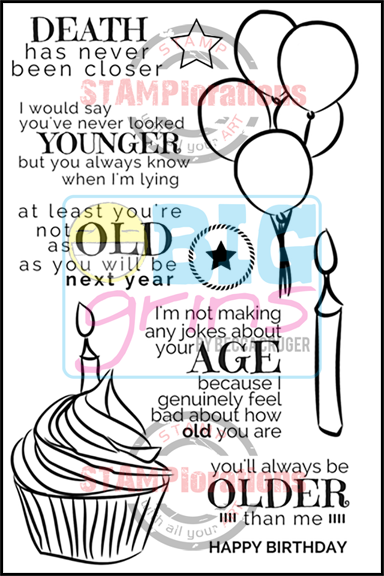
I used A Snarky Birthday to You to stamp the balloons and coloured them with pencils. The sentiment is computer generated. 

Second is an interactive card allowing me to show 2 ATCs:


The finished card folded is 41/4" by 51/2" and flip when opened.

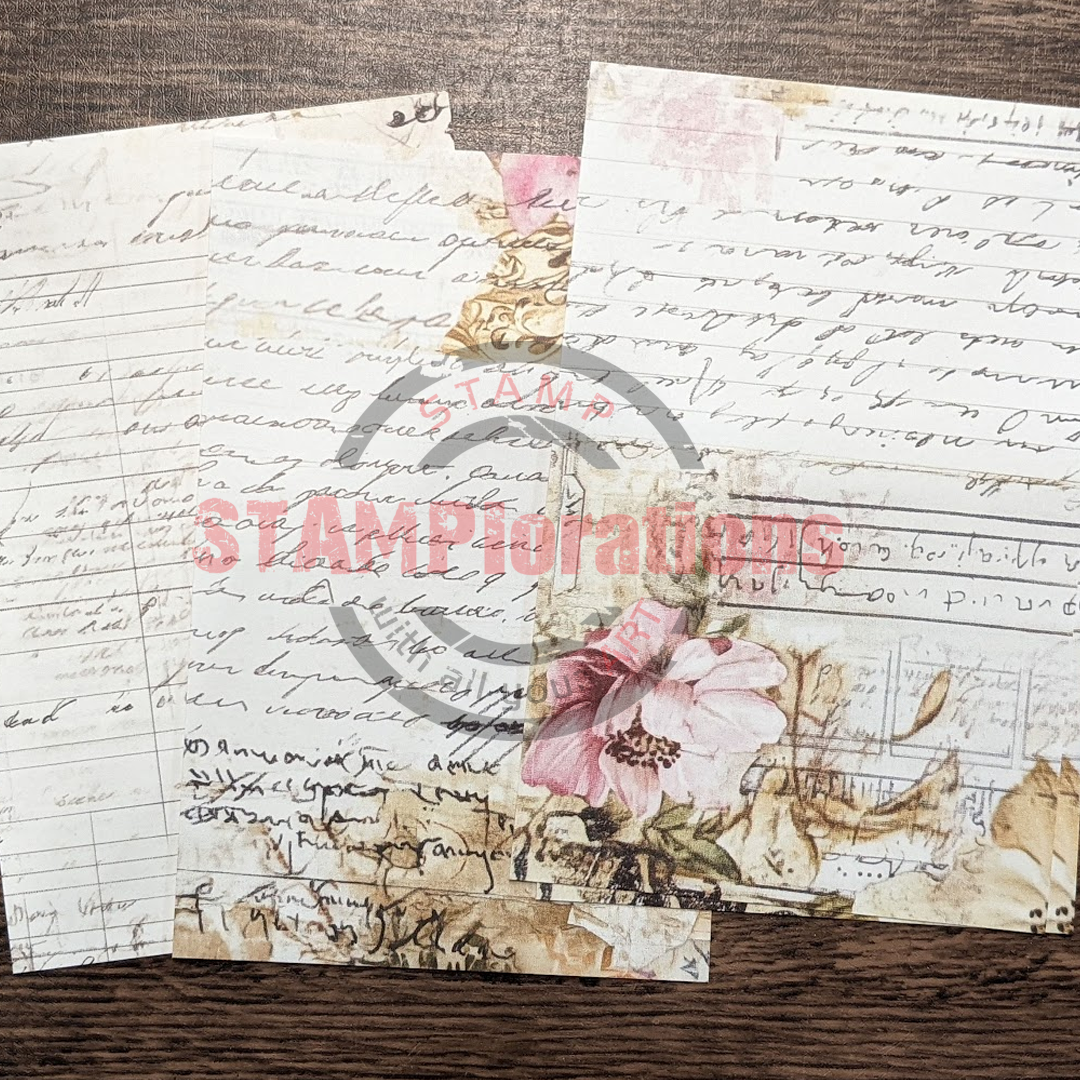
I simply matted the ATC's with appropriate colours and added pieces of Faded Botanicals Collage Papers and Old Letters Pocket Backdrops to the rest of the card. 

See it in action:


****************
If you fancy trying out the ATCs in your makes, think about the ATC VIP Subscription service to receive your choice of set every 4 weeks. The plan is flexible as you don't have to commit to a length of time and there are also added perks (all the details here.
I am personally trialling this and love the (almost) surprise landing on my doorstep!
****************


Thanks for coming by,

 Craftyfield   I am entering the Simon Says Stamp Wednesday challenge
 challenge 
                

Friday, 31 July 2026

Whimsical Homes

Hello crafters, 

It's that time again... a new pack of ATCs has landed and I came up with these projects.
First I created a card with a feminine feel to complement this dreamy house in soft pastel colours:
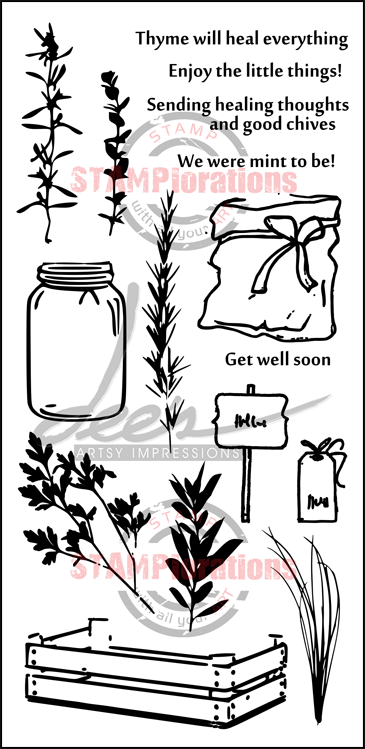
I created a background mat with one of the solid stamp in the Healing Herbs set with blue ink and one with pink ink and an oven mesh as a stencil (only bought it for that purpose, NOT for cooking...)

I added some ready made borders, gifted to me eons ago and a piece of ribbon.

My second card is inspired by sewing...

For background I used the Old Letters Pocket Backdrops (top) and the Faded Botanicals Collage Papers. The bottom layer has been die-cut with the Stitched Spring Landscape die and I added the trees and house die-cut from blue cardstock on top.

I sewed the paper to the card, going around several times with white and grey threads, as a way to  reinforce the theme, which is echoed by the (faux) stitching I used on the ATC. I chose faux stitching because the ATC cardstock is thick enough to give me concern over my machine!

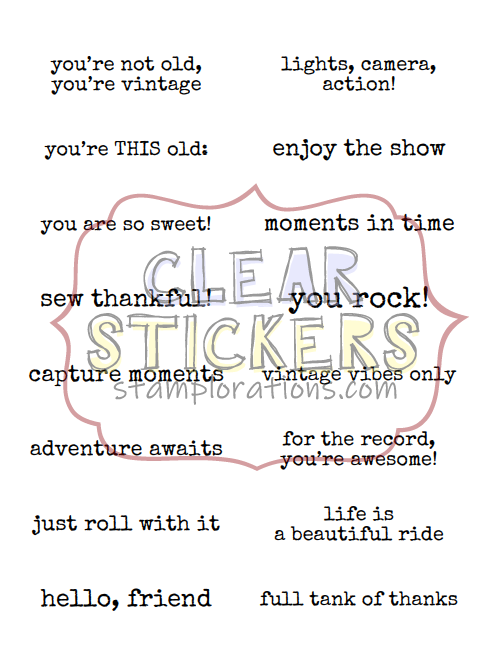
The final touches are a sentiment sticker from the Nostalgic #1 set and stamping of a small flower motif from the Life is sweeter set.

Another inspiration post with more Whimsical Homes ATC's is coming up soon...

****************
If you fancy trying out the ATCs in your makes, think about the ATC VIP Subscription service to receive your choice of set every 4 weeks. The plan is flexible as you don't have to commit to a length of time and there are also added perks (all the details here.
I am personally trialling this and love the (almost) surprise landing on my doorstep!
****************


Thanks for coming by,

 Craftyfield   My 2nd card is entering the Simon Says Stamp Monday Challenge 
                                                         and both are entering the Simon Says Stamp Wednesday challenge


Tuesday, 21 July 2026

Sunshine Bright

Hello crafters,
today I have a second post showcasing the Retro Femme ATCs released earlier this year. From the simple to the complex, ATCs can be included in all sorts of designs!

I took inspiration from the ATC's bright colours to create 2 cards:

I used one of the ATCs in the set with papers from my stash (very old freebie), cardstock mats, a piece of fabric and one of the ephemera from the Nostalgia #1 Ephemera Cut-Outs.

Finally I applied a sentiment sticker from the Nostalgic #1 set to an offcut of the background paper to place on top of the fabric.

My second card is just as bright...


This time I used the Strung Lights stencil to create both background papers, one with the Gelli plate and acrylic paints, the other with Distress Oxide ink. 

I added die-cuts, the butterfly from the Flutter Zen 1 Layering Dies set and one of the Bloomdala Bliss Felicity Dies.

A few gems and a sentiment, also from the Nostalgic #1 set, add the final touch to the design.
****************
If you fancy trying out the ATCs in your makes, think about the ATC VIP Subscription service to receive your choice of set every 4 weeks. The plan is flexible as you don't have to commit to a length of time and there are also added perks (all the details here.
I am personally trialling this and love the (almost) surprise landing on my doorstep!


Thanks for coming by,
 Craftyfield   


Saturday, 4 July 2026

Using stencils as background

Hello crafters, 
This fortnight, the Allsorts challenge optional theme, chosen by Donna is "Use stencils". As usual, you can also enter with an "anything goes" theme.

My inspiration card uses stencil as a background, no need of designer paper!


The stencil is from the mini stencil 39 by Tim Holtz, used with Distress inks.
The stamps and matching dies are from the Visible Image 99% Chance of Wine set. I inked the stamps with different colours of inks and coloured the bottle with pencils.

*******************
Hop over to the Allsorts challenge blog to see all the DT inspiration and upload your projects. Two winners will each receive three random stencils/sets from the below:


Thanks for coming by,

 Craftyfield   I am entering the Polkadoodles challenge

Friday, 3 July 2026

Coffee cups and flowers

Hello crafters, 
Rounding up our 5th day of Birthday Celebrations are 2 cards showcasing the latest product released by STAMPLorations. 
First up this lovely Coffee cup with flowers and cupcake:


I inked one of the Old Letters Pocket Backdrops with green Distress ink, cut to fit on an US A2 size card. 
I added one of the Flowers + Coffee Focal Fronts popped up with 3D sticky pads and a coffee sentiment from the set All Things Coffee - Clear Stickers which I cut into several pieces to fit in with the design.

Perfect for a quick card with impact!

For my second card I retrieved mica powders to add some sparkle...


I first stencilled a square of black card diagonally with the Winter Flowers Stencil by applying Versamark with Gold and Pink mica powders.The cup is one of the Flowers + Coffee Focal Fronts, which I have fussy cut only on the left side to remove the white border.

I added a sentiment sticker from the  All Things Coffee - Clear Stickers
Of course, as the ink of the sticker is black, I had to come up with a way to render it visible against the black card! My idea was both a solution and a design feature: cover the adhesive back with mica powders. 
I then applied some glue stick to the card and positioned the sticker on top to avoid disturbing the mica layer.

***********
Hop on to the STAMPlorations blog to see all of today's gorgeous team projects. Leave a comment letting us know which of the new featured products is your absolute favorite for a chance to win it! 🎂🎉
***********
To celebrate 13 years, shipping is FREE on all US orders of $25 or more this week only – and you'll get the Freebie of the Month automatically included in your order! Happy shopping! 🛍️✨

AND... whenever you shop for STAMPlorations products you can get 20% off with my code: STAMPGIRLCRAFTY

Thanks for coming by,

 Craftyfield   

Thursday, 2 July 2026

Oriental vibe

Hello crafters, 
Today is the penultimate day of our STAMPLorations Birthday Celebrations.

Whilst playing with the Profile 3 - Slimline stencil with different media I happened on the idea of a two-fer...
Unlike this project stencilled with acrylic paint, I used ink this time (Tsukineko Brilliance), applied directly with the pad to a Gelli plate print. I realised quickly that I was inking the entirety of the stencil and could be wasting a lot of ink! This gave me the idea of trying to transfer the ink onto  another  piece of Gelli plate.

To do this I placed the inked stencil face down on top of the Gelli print and run the sandwich through the die-cutting machine. The ink being slow drying, it did transfer to the Gelli print, which I then die cut with an oval shape die.
I also die-cut the stencilled face with the same oval, obtaining both "positive" and "negative" images... Yin and Yang...

As a nod to the oriental vibe I added some Bamboo stencilling to my base card with green ink, before adding the faces.
The sentiment is computer printed.

*******************
Hop to the STAMPLorations blog to see all of today's gorgeous team projects. Leave a comment letting us know which of the new featured products is your absolute favorite for a chance to win it! 🎂🎉
To celebrate 13 years, shipping is FREE on all US orders of $25 or more this week only – and you'll get the Freebie of the Month automatically included in your order! Happy shopping! 🛍️✨

AND... whenever you shop for STAMPlorations products you can get 20% off with my code: STAMPGIRLCRAFTY


Thanks for coming by,

 Craftyfield   I am entering the challenge
   

Wednesday, 1 July 2026

Quick cards with STAMPLorations Ephemera

Hello crafters, 
It's Day 3 of the Birthday celebrations at STAMPLorations and my first make is a coffee themed card:

For my background, I simply used a piece of paper (a freebie from a magazine eons ago) and added a few ephemera cut-out from the All Things Coffee Ephemera Cut-Outs pack. These come with a white border to help with the fussy cutting and I prefer no border so cut close to the image.

For sentiment I added a transparent sticker from the set All Things Coffee.
I refrained from adding anything as sometimes, less is more...

My second card is going for pretty and feminine with ephemera florals arranged in a frame:


The Floral Parade Ephemera Cut-Outs can be used as focal points but when I saw them I wanted to create a frame with them. My frame only uses 3 ephemera pieces (each has been cut in 2) for this make, placed on a 5.5" diameter circle card.  

The centre image is built up with stamps from the Blooming Buds set, using masks. (The stalk is bended, since one can do that with polymer stamps!).
**********
Head over to the STAMPlorations blog to see all of today's gorgeous team projects. Leave a comment letting us know which of the new featured products is your absolute favorite for a chance to win it! 🎂🎉
To celebrate 13 years, shipping is FREE on all US orders of $25 or more this week only – and you'll get the Freebie of the Month automatically included in your order! Happy shopping! 🛍️✨

AND... whenever you shop for STAMPlorations products you can get 20% off with my code: STAMPGIRLCRAFTY

Thanks for coming by,
 Craftyfield  

Monday, 29 June 2026

Birthday Cupcakes

Hello crafters, 
Today is Day 1 of the Birthday celebrations at STAMPLorations!
In store this week:

To tickle your appetite... cake cards! Because... who doesn't like cake!!!


I used some old papers and pink cardstock to showcase one of the images in the Big Cupcakes - Colorables pack, coloured with pencils. 
I added the Birthday word from the Skinny Sentiments to finish. 

I also created a quick tag to add to an accompanying present by simply stamping a sentiment at the back and punching a hole. The image is from the Big Birthday Cakes - Colorables.

For my second card I used a different medium for my cupcake:


I cut the panel with the largest of the Crazy Double Running Stitch Rectangle Nesting Dies, added a heart shape hand cut from patterned paper and a piece of doily.
As my focal point, I used an image from the Big Cupcakes - Colorables and coloured it with pencils and some dimensional paint that didn't puff up as much as it should have done... (too old methinks).
The sentiment, as well as the candle, is from the A Snarky Birthday to You stamp set. I fussy cut and coloured the candle with gel pen.

*******************
Hop to the STAMPLorations blog to see all of today's gorgeous team projects. Leave a comment letting us know which of the new featured products is your absolute favorite for a chance to win it! 🎂🎉
To celebrate 13 years, shipping is FREE on all US orders of $25 or more this week only – and you'll get the Freebie of the Month automatically included in your order! Happy shopping! 🛍️✨

AND... whenever you shop for STAMPlorations products you can get 20% off with my code: STAMPGIRLCRAFTY


Thanks for coming by,

 Craftyfield   I am entering the Simon Says Stamp Wednesday and 
                                                        Addicted to stamps & more challenges
         

Saturday, 20 June 2026

Dimensional Blooms

Hello crafters, 

This fortnight, the Allsorts challenge optional theme, chosen by Ellie is "Blooms/Birds/Butterflies". As usual, you can also enter with an "anything goes" theme.
Blooms are favourite for any occasion so I decided to have another go at creating realistic-looking pom pom dahlias:


I used Spellbinders Pom Pom Dahlia and Ladybugs Etched Dies s4-1317 to create the focal cluster and the Everyday Sentiments from the STAMPLorations set.
The whole is matted on an embossed panel with the Sizzix/Tim Holtz 3D Texture Fades Embossing Folder (665734) and a green cardstock mat.

I think I need more layers in my pom pom (The darkest flower has 3 layers of each size of flower, 15 layers in total) to get the fully rounded effect, but I have to say it takes a lot of time to form each petal with stylus and tweezers! 

*********
Hop over to the Allsorts challenge blog to see all the DT inspiration and upload your projects. A lucky winner will receive the Stampers Anonymous Tim Holtz Glorious Bouquet stamp set available from Buddly Crafts pictured below!
Thanks for coming by,

 Craftyfield     I am entering the Addicted to stamps & more and 
                                                         Polkadoodles challenges

Friday, 19 June 2026

Waterfall card with ATCs

Hello crafters, 

First let me announce the Wishlist Party event happening at STAMPLorations.


For all the details hop to the STAMPLorations blog. The Wishlist will be opened until the 3rd of July
***********

Today I have a special post showcasing the 
Retro Femme ATCs released earlier this year. From the simple to the complex, ATCs can be included in all sorts of designs!
My first card is more on the CAS style:

I cut a piece of cardstock and die-cut two of the sides with the Art Border #1
I added stencilling with Distress Inks and the Shutters Mini stencil.

After gluing in place the ATC, I stamped the Radiate Happy sentiment and added two flowers as I am making more of an effort to use embellishments... and matted the whole onto pink cardstock.


My second project is a waterfall card that shows off 4 different ATCs:


The card front looks like a gate fold and has the sentiment, a combination of computer printed words and stamping with the Thank You Coffee set as well as a bouquet, an ephemera from the Floral Parade Ephemera Cut-Outs pack.

When you open the card the waterfall is revealed: 


On the inside the 4 ATCs from the Retro Femme ATCs were simply glued to the waterfall mechanism.


********** 
If you fancy trying out the ATCs in your makes, think about the ATC VIP Subscription service to receive your choice of set every 4 weeks. The plan is flexible as you don't have to commit to a length of time and there are also added perks (all the details here).
I am personally trialling this and love the (almost) surprise landing on my doorstep! 
**********

 
Hope you like these makes, thanks for coming by!

 Craftyfield   I am entering the Addicted to stamps & more challenge