' ' ' 'Crafty Endeavours: April 2019

Tuesday 30 April 2019

Classic but striking

Today is our second inspiration day of the month at Crafts U Love! And I have carried on playing with the Go Press hot foil system and one of their recent Cut, Foil & Emboss Nesting Die Set. Go back to read my first post for a tutorial on the product.

This time I used the classic black and gold combination and wow... isn't that striking? Especially against the bright colours of the flowers!!!


I used an old technique to create my card, the name of which escapes me (if you know please tell me in the comment section as it has been driving me mad) to create my design.

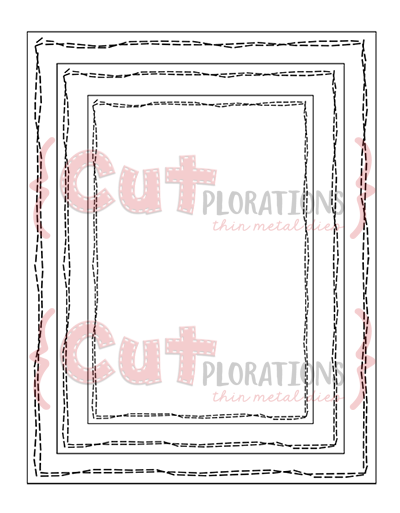
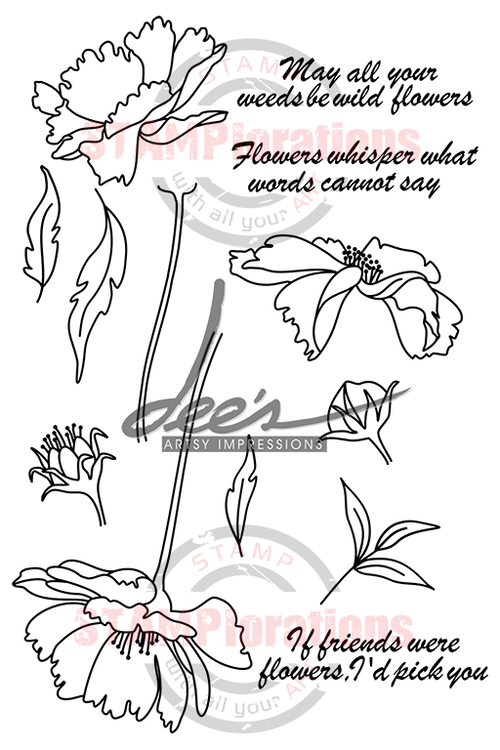
First I stamped and coloured Julie Hickey Designs Flower Garden stamp then selected 3 of the nesting Bracket Frames dies to die cut the image all at once .

I then used 3 of the alternate sizes of dies, starting with the largest to cut, emboss and foil mats out of black card all at once.

All that remains is to glue the shapes on top of each other, in alignement, and add a sentiment from the Julie Hickey Everyday Sentiments stamp set.

I didn't have a lot of time to test other materials but I did managed foiling on leather and this is a fabulous way to create small gifts.

I made a double sided label to add on a key ring (think memory sticks too) with 2 thin pieces of leather, sandwiching a piece of card for added strength. Mine were off-cuts from another project but you can find nice unblemished leather in 12x12 sheets in the Crafts U Love shop.


1. Cut, emboss and foil the top shape


2. Die cut a motif or initials from the foiled shape.


3. Foil the initials

4. Repeat for the other side and die cut a piece of card with the same die.

5. Glue the leather shapes to the card shape and add the initials. (If you haven't foiled the initials you can reverse the colours and place the red initials in the blue shape and vice versa for more interest)


6. It should now look something like this…

The blue leather was much more textured than the red so the foiling has a distressed look about it, but hey we crafters love a bit of distress, don't we?

To finish set an eyelet and place on your chosen key ring.
Below photos of the front and back.

 
Supplies:
Julie Hickey Designs Stamp Set - Flower Garden
Couture Creations Cut, Foil & Emboss Nesting Die Set - Bracket Frames
Julie Hickey Designs I Need It Stamp Set - Everyday Sentiments
Versafine Onyx Black ink
Foil
Leather 12x12 Sheet


Should you purchase any of the products I have used on this card, select  'Design Team'  in the 'where have you seen us' drop down so we know we have inspired you!


Thanks for coming by,
I am entering the challenges.

Friday 19 April 2019

Fallen

Time to join the STAMPLorations DT for a second inspiration post for our challenges, do check it out!
I made a card for the STAMPlorations Theme & Sketch April challenge and this time followed the sketch. Remember that you can either follow the sketch or the theme, and of course both!

The theme and sketch are:


For some reason, after years of ignoring bird stamps, I see that I come back to the Birds of Paradise set again and again and it always suggest fun and quirky ideas to me.


The background is stencilled Distress Inks with ARTplorations Nestled Circles and I also used Distress inks to create an arrow style mat for my sentiment (from the same stamp set), embossed in black powder.

The birds have been die-cut with the Birds of Paradise Coordinating Dies, stamped and then coloured with pens.


I hope that my card will bring a smile to your face too, and that you will be inspired to enter the Theme & Sketch challenge! There are prizes to be won...

***
Whenever you shop for STAMPlorations products you can get 20% off with my code: STAMPGIRLCRAFTY
***
Thanks for coming by,
I am entering the Addicted to Stamps challenge.


Monday 15 April 2019

Classic elegance

Today is inspiration day at Crafts U Love!

Foil started its comeback last year but this year there are even more new products for us to use to foil in varied ways and methods. This month I have been playing with the Go Press hot foil system and one of their recent Cut, Foil & Emboss Nesting Die Set.

As we approach "Wedding season" I felt a classic, clean design with a limited colour palette of white-red and gold would be the perfect choice to showcase foiling.


As there isn't a lot of documentation out there, I will start by explaining what these are.

First, like  standard nesting die sets, these will also die-cut a shape.

You can also letter press by adding ink to the die(s) :


But, combined with the Go Press machine, they will also emboss the edges and add foiled detail in one pass of the die-cutting machine.


Onto technique... this is a case of do what I say and not what I did!

Successful foiling is dependant on both temperature and pressure, if just one is slightly off, it will not be perfect and you will be frustrated (ahem!!!)

The process is simple but PRECISE, when the instructions tell you to heat up the machine with the die for 1 minute, 1 minute is required, not less.
A slight difference in the shims added to the sandwich will affect the result from perfect to...not so follow the instructions and adapt your shims if necessary (and take a note of what worked for next time!)

Note: all die-cutting sandwiches described relate to my Sizzix Big Shot Plus

Without the addition of the metal shim it is possible to foil the shape of the die without die-cutting into the card and this is what I did for the largest mat:


1. Die directly on the Go Press mat (no metal shim)


2. Place foil silver side up on the die


3. Place the cardstock on top


4. Place cardstock shim(s) on top and close the lid. For my machine I needed 2 pieces of fairly thick cardstock.


5. The embossed and foiled shape but not die-cut


For my next layer, I die-cut the shape and foiled at the same time, and added the metal shim directly on the  machine before the die and used only one cardstock shim instead of 2. One of the reason to always put a shim when foiling is to avoid foiling the transparent cover if the foil piece is larger than the cardstock being foiled.

My focal point is a bunch of flowers die-cut with the Tim Holtz Wildflowers stems and my sentiment is from the Everyday sentiments set by Julie Hickey.


A closer look at that beautifully foiled shape

I don't know if from your side of the screen, you get the excitement I got out of my first foray into hot foils, but I can tell you I am looking forward to test more techniques and materials! When I come back at the end of the month for my 2nd inspiration post I should have some wonderful things to show you....


Supplies:

Couture Creations Cut, Foil & Emboss Nesting Die Set - Bracket Frames
Tim Holtz Alterations Thinlits Die Set - Wildflower Stems #2
Couture Creations Foils
Hot foil machine: the Go Press isn't in stock but the new Spellbinders Glimmer Hot Foil System has just arrived and is compatible with lots of die-cutting machine including the Sizzix range.
Polkadoodles A5 Paper Pack - Colour of Spring
Julie Hickey Designs I Need It Stamp Set - Everyday Sentiments
VersaFine Onyx Black


Should you purchase any of the products I have used on this card, select  'Design Team'  in the 'where have you seen us' drop down so we know we have inspired you!


Thanks for coming by,
I am entering the Allsorts and SSS Monday challenge.

Friday 12 April 2019

Spring fling

Today I am joining my teammates at STAMPlorations on Day 12 of a special series of posts celebrating the spring season. Starting on the 1st of April there have been be tons of inspiration and a prize everyday for commenting on the DT and STAMPlorations blog posts.

If you missed my first post it's here.


Now, here's something you don't see often here... a no stamp card! Frequent visitors to my blog know that I don't usually make die-cuts only cards, not because I don't like them, but because it feels like cheating when all the work is done for you!

My project is a twofer (2 for 1) as I used a letter press technique that gave me a positive and a negative image from one die-cut.

I haven't got any step photos for this (so excited I forgot to take any!) but here is the process:

1. Ink up a piece of card at least 4"1/4 by 5"1/2 with your choice of Distress or Distress Oxide, blending smoothly between colours on the long side. Here I use Squeezed Lemonade, Mowed Lawn and Salty Ocean.

2. Die-cut your cover plate, mine is the gorgeous Dragonfly Cover Plate Die, from the inked piece of card.

3. Apply a piece of tape to the back of the die-cut as a hinge, then attach to your card base. Make sure the tape doesn't show through the die-cut. In my case I stuck it to the very thin frame at the top of the die cut.

4. Spritz the coloured side of the die-cut, protecting the card base from the water, close the hinge and run through your die-cut machine as an embossing sandwich.

The die-cut will have both debossed the design and transferred (some of) the ink to the card base.

Next finish your card with your choice of sentiment and embellishments. I used the CUTploration phrase - Life is Good and a piece of ribbon.

You have now a left over die-cut, perfectly usable on another card, which you can finish in the same way as the previous one as I did for mine:

STAMPlorations Dragonfly cover plate

I hope you like my project and enjoy those spring months!

Don't forget to leave a comment here before hopping to the STAMPlorations blog. You can comment on all the designers posts and the STAMPlorations blog for each day of the event, to be entered for the chance to win each day's prize.
 
Today's prize is a $15 gift certificate. You have until the 19th of April to comment.

***
All throughout April, products in the SPRING FLING section will be 25% off instantly + with my code STAMPGIRLCRAFTY you get an extra 20% off!
***
Thanks for coming by,
I am entering the Allsorts challenge.
   

Thursday 11 April 2019

Blooming woman

Spring is the time when nature blooms everywhere, and with the warming weather and brighter daylight, I bet people bloom too! Well, that's my inspiration for this card to fit the Country View Challenge theme, chosen by my teamie, Monika.


For my background I used the Shabby Roses stamp (Blue Fern Studios) which I inked with Distress Oxides in Picked Raspberry and Wilted Violet and stamped on watercolour card.

I stamped the focal image, Flora woman (Cheery Pie) in Versafine Clair Fantasia.

I added the sentiment from the ELB03 stamp set (Paper Artsy) stamped in the same ink and mounted on a maroon card base.

I hope you are inspired to enter the Country View Challenge, if you do you could win a £20 voucher to the Country View Crafts shop!

Thanks for coming by,
I am entering the SSS Wednesday, Uniko Studio, Lost Coast Designs , The Artistic Stamper, Addicted to stamps challenges.

Wednesday 10 April 2019

Blooming wild

Today I am joining my teammates at STAMPlorations on Day 10 of a special series of posts celebrating the spring season. Starting on the 1st of April there has been be lots of inspiration and a prize everyday for commenting on the DT and STAMPlorations blog posts. 


Gelli print with Blooming Bud stamp

For my background, I used a piece of Gelli printed paper which I made with Chalky finish acrylic paints and stencils. I cut a piece with the largest die in the Crazy Double Running Stitch Rectangle Nesting Dies.

I stamped one of the larger flower of the Blooming Buds set, both buds and 3 sizes of leaves using orange and green inks. I coloured the image with coloured pencils.

To finish I used one of the sentiment from the same set and embossed it in Midnight Blue powder (a dark navy blue with a hint of shimmer).

Don't forget to leave a comment here before hopping to the STAMPlorations blog. You can comment on all the designers posts and the STAMPlorations blog for each day of the event, to be entered for the chance to win each day's prize, today's prize is a 4x8 stamp set ($20 value) of your choice. You have until the 19th of April to comment.

***
All throughout April, products in the SPRING FLING section will be 25% off instantly + with my code STAMPGIRLCRAFTY you get an extra 20% off!
***

Thanks for coming by,
I am entering the Craft Stamper TIMI, Lost Coast Designs, Penny Black and more challenges.
   

Friday 5 April 2019

Song bird

Welcome to the STAMPlorations Theme & Sketch April challenge

This month the theme and sketch are:


Following the Watercolour theme I created a background for my bird by pouring several colours successively on a piece of thick watercolour card. I let the colours dry between each application so they didn't mix into mud.
I stamped and embossed the bird from the Trendy Birds 2 set and the sentiment from the For the Birds set with white embossing powder, then added accents with violet and red powders.

I hope I have inspired you to join for the STAMPlorations Theme & Sketch April challenge, remember that you have to follow either the Sketch OR the Theme but you can use both if you're up for a challenge! If you do play with us you could win a prize...

***
Whenever you shop for STAMPlorations products you can get 20% off with my code: STAMPGIRLCRAFTY
***

Thanks for coming by,
I am entering the Casology and SSS Wednesday challenges.
   

Monday 1 April 2019

Breath of Spring

I can't believe it's already April! But no, it isn't an April's fool trick, it really is the 1st of April and we have a new challenge at Country View!
 
My teamie Monika chose Easter or Spring and I decided to create a card with a Spring vibe.

For the background I sprayed blue and dark pink inks through a stencil (Tando - Leaves) . I die cut the card with a stitched frame die (STAMPlorations - Crazy Double Running Stitch Rectangle)

I stamped and embossed in green powder (WOW Embossing powder Olive) the sentiment from the Breath of Spring stamp set (Chocolate Baroque)  and added a frame die-cut (Studio Light So Spring - No.78 Hearts).

Do pop over to the Country View Challenges blog where you can see more inspirational makes from the DT and link your own Easter/Spring creations for the chance to win a £20 voucher for the Country View shop.

Thanks for coming by,
I am entering the SSS Wednesday, Uniko Studio challenges.