This time I used the classic black and gold combination and wow... isn't that striking? Especially against the bright colours of the flowers!!!

I used an old technique to create my card, the name of which escapes me (if you know please tell me in the comment section as it has been driving me mad) to create my design.
First I stamped and coloured Julie Hickey Designs Flower Garden stamp then selected 3 of the nesting Bracket Frames dies to die cut the image all at once .
I then used 3 of the alternate sizes of dies, starting with the largest to cut, emboss and foil mats out of black card all at once.
All that remains is to glue the shapes on top of each other, in alignement, and add a sentiment from the Julie Hickey Everyday Sentiments stamp set.
I didn't have a lot of time to test other materials but I did managed foiling on leather and this is a fabulous way to create small gifts.
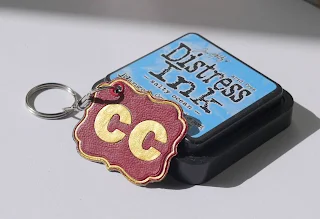
I made a double sided label to add on a key ring (think memory sticks too) with 2 thin pieces of leather, sandwiching a piece of card for added strength. Mine were off-cuts from another project but you can find nice unblemished leather in 12x12 sheets in the Crafts U Love shop.
 1. Cut, emboss and foil the top shape
2. Die cut a motif or initials from the foiled shape.

3. Foil the initials
4. Repeat for the other side and die cut a piece of card with the same die.
5. Glue the leather shapes to the card shape and add the initials. (If you haven't foiled the initials you can reverse the colours and place the red initials in the blue shape and vice versa for more interest)

6. It should now look something like this…
The blue leather was much more textured than the red so the foiling has a distressed look about it, but hey we crafters love a bit of distress, don't we?
To finish set an eyelet and place on your chosen key ring.
Below photos of the front and back.

|  |
Julie Hickey Designs Stamp Set - Flower Garden
Couture Creations Cut, Foil & Emboss Nesting Die Set - Bracket Frames
Julie Hickey Designs I Need It Stamp Set - Everyday Sentiments
Versafine Onyx Black ink
Foil
Leather 12x12 Sheet
Should you purchase any of the products I have used on this card, select 'Design Team' in the 'where have you seen us' drop down so we know we have inspired you!
Thanks for coming by,
 I am entering the challenges.


Coucou,
ReplyDeleteDésolée pour l'absence de ces dernières semaines, je ne peux plus suivre le rythme en ce moment :(
Ta carte est superbe, belle utilisation de tes dies encore une fois !
Et j'adore ton astuce et la manière dont tu as réutilisé tes chutes de cuir et foil!!!
Bon 1er mai, bises
Stunning card the foiling really helps to lift it and make it even more delicate xx
ReplyDeleteHi Christine, I love this technique and I believe one of the names given to a similar technique was Tripple Time Stamping but that uses three different size pieces of card and I don't think that's what you've done here so maybe it's called Faux Tripple Time Stamping. Wishing you a happy Bank Holiday, Angela xXx
ReplyDelete