Thursday, 22 October 2020

7th Anniversary Day 4 Fall Leaves

Welcome to Day 4 of our STAMPlorations Birthday's celebrations !


The russets, yellows and brown of Autumn go so well with gold that I wanted to add some foiling in my make. One of the easiest way is with a stencil, some acrylic medium (this can be matte or gloss) foil and either a foiling machine or a laminator.


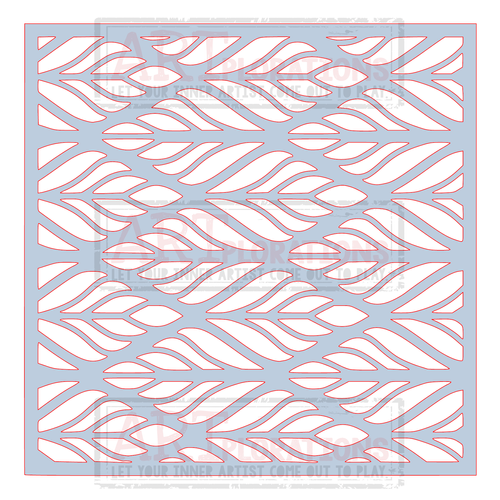
 I started with a manilla tag and applied  Fresco paints (Paper Artsy) roughly to the tag, spreading with a brayer. I then applied paints through the Leaf Prints 3 stencil and layered some acrylic medium on top here and there for the foiling process.

To foil I just sandwich the foil and the tag in a folded piece of paper, and run it through the laminator.

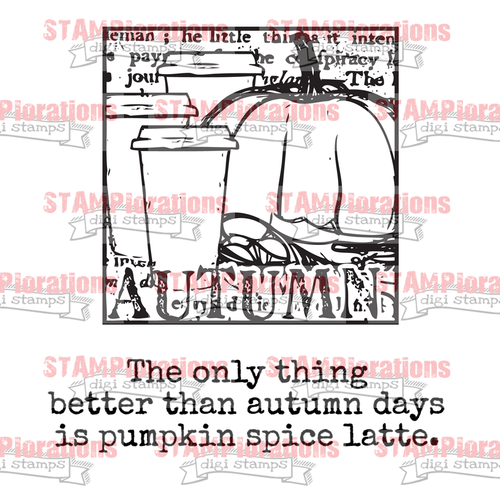
For my focal point, I stamped some leaves from the Trendy Leaves set inked with several colours of dye inks and fussy cut them. I shaped them and popped them on foam pads to add dimension and placed them on a piece of doily. 

Finally I added a Dymo label and a Nuvo Drop finish. 

A closer look at the shine from the foil...


***
The STAMP girls are showing inspiration for all the challenges on the STAMPlorations blog so pop by and don't forget to comment along the way for a chance to win (before the 8th of November)!

***
Whenever you shop for STAMPlorations products you can get 20% off with my code: STAMPGIRLCRAFTY 
AND during the Anniversary all orders placed with my code will include this not-yet-released stencil, Just Plaid square stencil (10 mil):

***


Thanks for coming by,


Wednesday, 21 October 2020

7th Anniversary Day 3 I have this one sewn up

Welcome to our 3rd day of STAMPlorations Birthday's celebration.


Today I am road testing the Circles all over Cover plate.


As soon as I saw it I thought Stitching... 

I die-cut the cover plate out of orange cardstock, using a standard die-cutting sandwich NOT embossing sandwich, since I wanted to go though the holes with a needle and mere embossing just imprints the texture.

I used a multicoloured metallic thread to create the designs. It's very simple to do, but quite time consuming, especially if you are an inexperienced sewer like me!

My focal point is the negative  Art Happens die-cut into black card and inlaid with the positive die cut from another piece of card inked in orange and purple.

***
The STAMP girls are showing inspiration on the STAMPlorations blog so pop by and don't forget to comment along the way for a chance to win. (before the 8th of November)!

***
Whenever you shop for STAMPlorations products you can get 20% off with my code: STAMPGIRLCRAFTY 
AND during the Anniversary all orders placed with my code will include this not-yet-released stencil, Just Plaid square stencil (10 mil):

***

Thanks for coming by,


Tuesday, 20 October 2020

7th Anniversary Day 2 Forever Roses

Welcome back for our 2nd day of STAMPlorations Birthday Celebration 


Unusually, today I have a card with with patterned papers! I used the Basic A2 Panels Nesting Dies to cut quickly and easily a few pieces and layering them simply on my base card.


The focal image is from the Bloomfully: Forever stamp set, recently released.  I stamped it with Distress inks in pale pink and Antique Linen for the leaves to get a no-line colouring look.
 
I then used watercolours and a brush for the roses and added a stamped sentiment from the same set.

***

The STAMP girls are showing inspiration for all the challenges on the STAMPlorations blog so pop by and don't forget to comment along the way for a chance to win (before the 8th of November)!

You can see all of the new sets released here    


***
Whenever you shop for STAMPlorations products you can get 20% off with my code: STAMPGIRLCRAFTY 
AND during the Anniversary all orders placed with my code will include this not-yet-released stencil, Just Plaid square stencil (10 mil):

***

Thanks for coming by,
I am entering the challenges.


Monday, 19 October 2020

7th Anniversary Autumn trees & Latte

Welcome to the first day of  STAMPlorations 7th Birthday celebrations
A bit later than usual, due to Covid19, but every bit as good as previous years and I think even better !


Today I have a slimline card for you. Slimline cards have seen a sudden surge of popularity across the pond and manufacturers have responded with designs adapted to this format. The 8.5" x 3.5"fits the US business envelope and uses the whole width of the standard US paper size. 

I have tweaked my measurements to European size A4,  cutting the sheet of card to roughly 6"1/2 lengthwise and keeping the whole portrait width, giving a folded size of 8" by 3"1/4 (or 21x 8.9cms). Slightly smaller than the stencil and less wide than the DL envelope but still OK.
 
 
To make it I first used some Distress inks to establish a sky and grass background.
 

Then I placed the Trees – ARTplorations Slimline stencil on top and used Distress Oxides with a sponge. DOs are much more opaque than DIs and I needed this property to show up against the green of the grass!

 
Tip: to counteract the green of the grass I used Violet first and then Walnut ink.
To finish I used white gel pen over the small lines of the trees to hide the background colour.

The sentiment from the Better Than Autumn set has been inked with a Kaleidacolor ink pad and stamped on glossy card. I added 2 leaf brads and mounted it on foam pads .

 ***
The STAMP girls are showing inspiration for all the challenges on the STAMPlorations blog so pop by and don't forget to comment along the way for a chance to win (before the 8th of November)!

***
Whenever you shop for STAMPlorations products you can get 20% off with my code: STAMPGIRLCRAFTY 
AND during the Anniversary all orders placed with my code will include this not-yet-released stencil, Just Plaid square stencil (10 mil):

***

Do come by tomorrow for more inspiration as the celebration continues....


Thursday, 15 October 2020

Snowy scene with robin

Just a quick post to enter this little guy in the Allsorts challenge.


The church stamp is from the Crafty Individuals CI-474 set, the sheep from CI-467 and the robin is 
CI-456.
The hill the robins stands on is a Stampscape stamp, 205F Boulders with Lichen.


The sky, church and ground have been watercoloured , the bird was stamped in coloured inks so I only needed to add a little colour .

As a final touch I added falling snowflakes with thick gesso and sprinkled white flock in places for that fluffy effect of real snowflakes.

Thanks for coming by,
I am also entering the We Love Chocolate Baroque challenge.

Warning giant arachnid on the loose

Today I am showing another Halloween scene for our October Country View Challenge hosted by the lovely Monika.

If the giant spider hasn't put you off... Here is how I made my scene. 


The arch with tree branches has been cut from Black Magic Core'dination (yes I do still have a large stock of it...) with the Sizzix Thinlits Christmas Shadow Box die set. Although a lot of the dies are Christmassy and cute I thought the wooded aperture could be made to look sinister... I also converted a dove into a black bird, not as menacing as a crow but good enough to create an impression!

The background has been created with inks, both Distress and Distress Oxides. I added the moon with a stencil and paint.

The top layer has been embossed with a drip motif, which I sanded back and I drew a web with a pencil before adding my ghosts, pumpkin and black spider "confetti".

I am quite pleased I managed a scene with my limited Halloween stash! Now it's over to you now, have a look at what the DT made on the Country View Challenge blog and link up your project to the challenge for the chance to win a £20 voucher for the Country View Craft shop.

Thanks for coming by,
I am entering the SSS Monday challenge.

Thursday, 1 October 2020

Cups of Pumpkin

After the strangest summer of my life, and probably yours too, the STAMPlorations challenges are starting again. Today I am showing you an inspiration make for the Theme & Photo Prompt challenge.


You can either follow the theme, the photo and of course both! I chose to  make a CAS card with lots of white leaving the Autumn colours to shine.


I used the Coffee To Go: Fall and Winter and stamped my two cups before fussy cutting them. I then shaped them with a slight curve and stuck in place with foam pads. 

I added the sentiment from the Better Than Autumn set inked with a Kaleidacolor inkpad. 


The STAMP girls are showing inspiration on the STAMPlorations blog so pop by and don't forget to enter our Theme and Photo Prompt challenge.

***
Whenever you shop for STAMPlorations products you can get 20% off with my code: STAMPGIRLCRAFTY
***

Thanks for coming by,
I am entering the SSS Wednesday, Allsorts, Casology challenges.


The Gates of Halloween

Be afraid, be very afraid... mwahaha

Yes it's Halloween this month and the theme chosen by Monika for our Country View Challenge...
You must create a Halloween scene.


I stamped the Beware Gate (Stampendous) in Memento Black and the Moon in Memento London Fog (Lavinia) first, then applied Distress inks with Distress Foam in Carved Pumpkin, Chipped Sapphire, Wilted Violet and Forest Moss.

The Halloween word has been created by die-cutting individual letters with the Tim Holtz/Sizzix  Alphanumeric Script set (662228), which was given to me by a generous crafty friend.
It came in really useful as I don't "do" much Halloween and so have limited supplies on this particular theme!

Over to you now, have a look at what the DT made on the Country View Challenge blog and link up your project to the challenge for the chance to win a £20 voucher for the Country View Craft shop.

Thanks for coming by,
I am entering the SSS WednesdayUnikostudio challenges.

Thursday, 10 September 2020

Butterfly Lady

Do you have stash that you had to have but hardly use? This Mixed Media Thinlet set by Tim Holtz is one of them, I just don't know how to use these corners in a way that feels natural and actually "adds" something to the card/tag/page.

Recently I saw some makes that gave me the idea I used to create today's card with one of the corner dies as iron gates (distressed gates...) and a lovely Lost Coast Design stamp (Winged Girl NS).


The background is a Gelli print. I coloured the lady with pencils and embossed the die-cuts with Aged Aqua Frantage, adding some Aged Copper here and there .


I hope you like it!

Thanks for coming by,
I am entering the AllsortsSSS MondayLost Coast Designs, We Love Chocolate Baroque challenges.

Saturday, 5 September 2020

Bird's nest


Today for my second inspiration post for our Country View Challenge, I have created a Mixed Media tag with lots of bits from my leftovers "bin". I based the colour scheme on the complementary colours red and green but chose the less aggressive shades of each, adding white to the primary colours.

My tag base is a Mixed Media paper on which I first used Distress inks in green and pink.

I then stamped with Memento inks in green and pink several stamps from Paper Artsy ESN07 and ESN10 - my go to texture stamp sets- both by Sara Naumann. I added some black ink stamping with an ancient Kaisercraft texture stamp and a few motifs from a Finnabair/Prima stamp set (Trust the magic).

I added some (transparent) crackle texture paste here and there and highlighted the cracks with dark Distress inks.


The bird is die-cut out off felt with a CUTploration die (For the Birds), the Authentic is die-cut from metal with a word from the Thinlits - Adventure Words: Script by Sizzix/Tim Holtz. Other bits joining the cluster are partial die-cuts and a piece of home made washi tape and of course the "nest" made of twine with added shiny stones, magpie style, which are Stamperia Glamour - Sparkles in Sparkling White. I bought them for snow but being a bit chunky they were perfect as treasure...

Another look:


What colour pair are you going to choose for your own Contrasting colour entry to this month's  Country View Challenge ? Remember that if you link up, you are in with a chance to win a £20 voucher for the Country View Craft shop!


Thanks for coming by,
I am entering the SSS WednesdayWe Love To Create  challenges.

Tuesday, 1 September 2020

Complementary coasters

And the holiday season finishes with a whimper... not much to rejoice, so I am thankful for the enjoyment I get from crafting. Not quite sure what is going to happen this September school wise but at least our Country View Challenge is kicking off as expected.


This month Evelyn has chosen Complementary colours as the theme. I'm guessing lots of you will already know what complementary colour pairs are, but if not, any decent search engine should give you the necessary explanations.

Today I chose my favourite "male" colour scheme with blue-orange as the complementary pair.


I used alcohol inks with a plastic palette, alcohol lift ink and polymer plate to lift the print onto my MDF coasters, which I had first prepared with Gesso.


I cleaned up on separate pieces of cardstock, waste not want not... and on a whim added gold foil on what appeared to be still sticky.

Then, I simply stamped quotes from Paper Artsy set HP1901 and HP1206. I have a few more coasters to do so I will leave the finishing for some other time, but these will need protecting with several layers of varnish, preferably one that can take high temperatures for hot drinks.


Over to you now, have a look at what the DT made on the Country View Challenge blog and link up your project to the challenge for the chance to win a £20 voucher for the Country View Craft shop.

Thanks for coming by,
I am entering the SSS Wednesday and Paperbabe  challenges.