Monday, 15 July 2019

Framework


Today is my turn to show you what I made with some of the new products arriving at Crafts U Love. One of them keeps going out of stock so I was excited to finally lay my hands on it... the Julie Hickey Designs Layers, Frames & Banners Die Set!

Why so excited you ask?
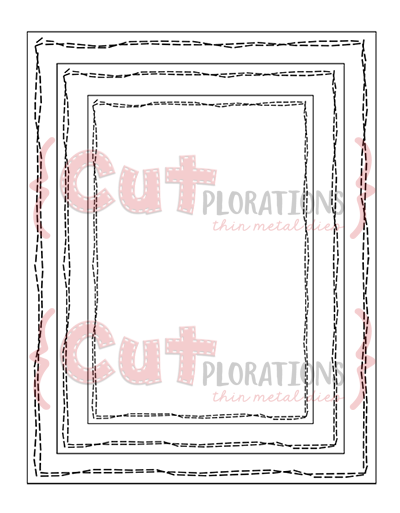
  1. The mix of rectangular dies allow for 4 different sizes mats and 2 thin frames. By mixing those together on different colours of cardstock the possibilities are endless  (well not in a mathematical sense but...)
  2. The smaller dies can be used for sentiments and 3 of them are perfect for thin sentiments which is something that was missing from my arsenal. Of course, they also match well with Julie Hickey Designs Everyday Sentiments
  3. And finally, above all, the one feature that I have been waiting for since I started die-cutting... the dies sizes are proportional to our A6 cards (14.8 by 10.5cms) rather than the US standard card size (5"1/2 by 4"1/4 ). So now I can matt and layer using any standard paper and card...
Nuff said let's get on with the today's tutorial:


1. Using the largest (scalloped) die I first die-cut a panel and using the 3rd die down in size cut the middle out, creating a frame.
2. To make it easy for myself I then embossed it from the back with the second size down die (the largest of the thin frames).
3. I used the same die to cut out a frame with another colour of cardstock.

4. I finished my frame by sticking the thin frame in the channel I created in step 2.
With the left overs I also got a second frame thrown in!


For the background behind the frame, I made my own patterned paper using stamps and 2 colours of Nuvo Drops as paint.
Slightly unorthodox I know,  but I wanted to see if it worked and also making sure that colours matched...
To do this I spread a bit of product in a thin layer on my craft mat with a silicone tool then tapped the stamp lightly on the paint.

The Nuvo Drops I used are from the Vintage range and have a matt finish to them after drying. The stamp set is one of the many Vintage motifs sets released th year by Woodware and you know I like my Vintage...

Using the same stamp set I stamped the postcard and butterfly several times (I only needed one of each for this project but this will save me time in the long run)

I chose vellum for the butterfly which can be coloured both from the front and the back for a deeper colour.

Putting it all together on a blue card base with a banner die-cut, stamped and embossed with a sentiment and finished with Bonnie Blue Nuvo Drops at the corners of the frame and on the small heart of the banner. I did consider adding a dot to each pierced hole of the scalloped frame but I didn't fancy my chances of getting them all the same size and in the right place too!


Supplies:

Julie Hickey Designs Layers, Frames & Banners Die Set - Rectangle
Julie Hickey Designs I Need It Stamp Set - Everyday Sentiments
Tonic Studios Nuvo Vintage Drops - Bonnie Blue and Chocolate Chip
Woodware Clear Stamp Set - Old Postcard
Vicki Boutin Kaleidoscope Silicon Art Wedge
Tim Holtz Distress Ink Pad – Antique Linen
Brilliance inkpad
Creative Expressions White A4 Vellum
WOW! Embossing Powder - Seafoam White

Should you purchase any of the products I have used on this card, select  'Design Team'  in the 'where have you seen us' drop down so we know we have inspired you!


Come by at the end of the month for another inspiration post for Crafts U Love.
In the meantime... keep cool and carry on crafting!

Catching-up

This month's Country View Challenge theme has given me the opportunity to finally complete a Paper Artsy project I started in February... Corrie's theme of Blues and greens matches the colours Leandra had picked for the workshop and everything falls into place!


The background has been built up with layers of Paper Artsy Fresco paints, stencilling (PS126) and stamping (HP1901).

The focal point from  HP1902 has been stamped and embossed twice and coloured with Paper Artsy Infusions. One of the image had the inside of the window/door cut out and was popped up on foam pads before placing over the other copy.
The paper doll... well you all know where that comes from, don't you!

And now I have sort of caught up with the previous release of Paper Artsy stamps I can cast a serious look to the latest one and those yummy sets that are/have been coming up this month...

But I digress... I hope I have inspired you to enter our Country View Challenge, remember there is a £20 voucher to be won, just saying…

Thanks for coming by,

Monday, 1 July 2019

Cultivating my own garden

A new Country View Challenge is starting and the theme, chosen by the lovely Corrie, is Blues and Greens, a perfect combination for a seascape in summer. But not what I decided to make in the end, as I stayed closer to home and tried to reproduced the luxuriance of my Hydrangeas blooms.


OK my flowers are actually pink and the stamp I used is in fact a Dahlia set by Papertrey Ink (old and retired I believe) but hey ho it's an artist's impression...  Each image is stamped in 3 steps to give a 3D look, and the effect IS gorgeous, but aligning the stamps does take a lot of time and effort!


I stamped the small and large dahlias from the set with 3 shades of blue Memento inks and die-cut them with the matching dies. I did the same with the leaves, large and small.

Once I had settled for a composition on my base card (a lot of paper pushing involved in that step) I took a photo to help me stick the die-cuts in the right order and with the right thickness of foam pads to give the look I had in mind.


The sentiment is pre-printed on the card base.

Now it's your turn to create something with Blues and Greens, to be in with a chance to win a £20 voucher to the Country View Craft shop. Go on what are you waiting for...

Thanks for coming by,
I am entering the SSS Wednesday challenge.

Monday, 17 June 2019

Butterfly eyes

Today is for my second Country View Challenge inspiration post, and let me tell you it did not turn out how I had envisioned at all... I was thinking Vintage, shabby chic etc... but once I had started my background I loved the bright colours and wanted to keep with it.

Our challenge theme this month, chosen by the lovely Jane, is "It's a bug's life" so, of course I have a few insects on the tag, but the star of the show is a rather fantasy butterfly... gifted to me by a crafter friend.


I used 3 colours of Paper Artsy Fresco paints and their brayer to colour my tag. Here's the first layer on the right.

My next move was to add dark touches with Blueberry Fresco, especially around the tag. I then knocked it back with the Blue Oyster as it was a bit fierce.

All in all it probably took 10 minutes and the paints dry very quickly!

My focal image is one by Carabelle Studio,  Sweet Butterfly Eyes, it is stamped in black and embossed, then coloured with watercolour pencils.

 I popped it up on foam pads and placed on a die-cut (Crafters Companion - Create a Flower Metal Die - What A Mesh!) which loosely reminds me of the broken surface of a lake.


For embellishments I played with lots of embossing, first with the Adelaide stem (Memory box) die-cut which I embossed with Ultra thick Tropic red powder for the blooms  and Moss green EP for the stem.
The small wooden bee has been embossed in yellow for the body, Chai Latte for the wings and black for the head (since you ask, yes it is fiddly work!)

The wooden dragonfly has been embossed with a mix of Vintage peacock and Seaglass.

All powders are from Wow embossing, apart from the Ultra Thick Embossing crystals in tropic red (Cosmic Shimmer )

I hope that I did justice to that beautiful butterfly image and that I have inspired you to join our Country View challenge. Don't forget a random player will scoop up a £20 voucher to spend on crafting goodies...

Thanks for coming by,
I am entering the  We Love To Create, Craft Stamper TIMI, Penny Black and more, Stamping Sensations challenges.

Friday, 14 June 2019

For our elders...

Did you know STAMPlorations are celebrating their 6th Birthday  this month?
 
6th Birthday

To coincide with the event our Theme & Sketch challenge is about Birthdays too and I have a second inspiration make today.
 
The theme and sketch are:


I used both Theme and Sketch for this birthday card and pulled out my A Snarky Birthday to You stamp set again.


This time I went for a Vintage vibe with old newsprint paper and doilies for the background.
My focal point is the sentiment, which I masked before stamping the balloons from the same set.
To give this waxy, aged look, I used Seth Apter's Vintage Beeswax embossing powder in a thick layer all over the panel.

The final touch is the stamped and embossed "Happy Birthday" , sarcastically placed after the put down! I can see a lot of siblings liking this one....

Check out further inspiration from my teamies for all the challenges here
 
***
If you feel like shopping, check out the Birthday Summer sale


 And don't forget, whenever  you shop for STAMPlorations products you can get 20% off with my code: STAMPGIRLCRAFTY
***

Thanks for coming by,
I am entering the Addicted to stamps  challenges.


Friday, 7 June 2019

Sarcastic Birthday

June started so well... but the rain is back again. Still today we can cheer ourselves with a new STAMPlorations Theme & Sketch Challenge!

The theme and sketch are:


I chose to go with the theme and created a Birthday card with the fun A Snarky Birthday to You stamp set.


I first die-cut some Kraft cardstock with the Crazy Double Running Stitch Rectangle Nesting Dies to use as my card base. Then, with the help of my stamping platform I stamped 2 rows of candles from the A Snarky Birthday to You set with red dye ink .


I created a topper by stamping the sentiment and balloon from the same set with a Kaleidacolor inkpad. I then die-cut it, but with a twist…

For the more recent die-cutters among us, I used this old technique which consist of fussy cutting part of the image with scissors and then die-cutting the rest of the image with a shape die.
As shown in the photo, the rectangle die is inserted under the fussy cut shape so that it doesn't get cut off by the die.

The balloons have been coloured with watercolour pencils and a water brush.

I love the fact I used the same set for both background and focal image, it's just a different way to use my stamps!

Over to you now... you can follow either the sketch or the theme and of course both, to enter the STAMplorations Theme & Sketch challenge for the chance to win prizes...

***
Whenever you shop for STAMPlorations products you can get 20% off with my code: STAMPGIRLCRAFTY
***

Thanks for coming by,
I am entering the Craft Stamper TIMI, Stamping Sensations, SSS Wednesday challenges.


Saturday, 1 June 2019

It's a bug's life

Summer is finally around the corner, the heat of the sunshine, the holidays and the... bugs everywhere! Maybe why my teamie Jane chose It's a bug's life as the theme for our Country View Challenges this month....

Today I am showing you a page with 2 of my favourites bugs, dragonflies and butterflies.

I covered my journal pages with a printed paper and added both Tim Holtz/Ideology tissue tape  and Prima Spread Your Wings washi tape around the borders. The Prima (new) is very wide (5cms/2") and also more resistant to water/waterbased paints than the Tim Holtz tape. I bought it specifically for its width as it can be torn in half for a straight line on the outside of the journal and distressed on the inside. Also, since the Eclipse tape (a tape use to cut out masks for stamping) is impossible to find, I will be able to use the Prima tape instead, I know it sounds like waste but there is a lot of tape on that roll!

I then stencilled with Paper Artsy Fresco paints using PS126 and PS092 stencils (also Paper Artsy) and the Dragonfly stencil (That Special Touch) .

The sentiment, embossed in white EP, is from the Paper Artsy Hot Pick 1206.

To finish, I gave the left hand stencilled flower a stalk and leaves with acrylic paint and a paintbrush and added a butterfly made of 2 layered die-cuts and stitched together in the middle.


I hope that I have inspired you to join our Country View challenge, hop on over to see my teammates makes and don't forget a random player will scoop up a £20 voucher to spend on crafting goodies...

Thanks for coming by,
I am entering the SSS Wednesday, Bleeding Art, We Love To Create challenges.

Friday, 24 May 2019

Wild Birthday

Just a quick post to show you this Birthday card, straight out from Africa!

All the stamps are from Creative Stamping magazine issue 57 (May 2018).


I stamped the giraffe with Versafine Sepia ink, coloured it with Distress inks and masked it before stamping the tree and birds in Versafine Onyx black.

I applied Distress inks to the sky and added both sentiments, Go wild inked with Kaleidacolor for a red to orange blend, and the Birthday sentiment with Versafine Onyx Black.

Thanks for coming by,
I am entering the Allsorts, Paperbabe and Unikostudio challenges.

Sunday, 19 May 2019

Yellow and Purple make grey

 I am back for a second inspiration post for our challenge at Country View Crafts! The theme chosen by Teresa is Opposites. I chose the easy option of colour opposites (on the colour wheel) so I could use any stamps, or rather, new stamps that I have barely touched since I got them in February and couldn't wait to use at last!

I cracked open my Paper Artsy goodies and off I stamped a one layer card, with barely any masking, pure stamping pleasure!


I simply stamped the top of the clock stamp from the HP1901 set in black, then the scribbled flower in Memento Grape Jelly, the chevron and dots with yellow dye ink all from the ETS25 set.

I felt the lower left corner needed some black so I added the ear of wheat from the ELB33 set, an old favourite of mine.

I hope I have inspired you to enter our challenge, remember one lucky crafter will win a £20 voucher to spend on Country View Crafts goodies...

Thanks for coming by,
I am entering the Addicted to stampsCraft StamperPenny Black and more  challenges.

Friday, 17 May 2019

Seriously

Welcome to my second inspiration card for the STAMPlorations Theme & Sketch challenge! All the STAMPlorations DT are showing their contributions on the STAMPlorations blog here.

This month the theme and Sketch are:


Wednesday, 1 May 2019

Here comes the sun

Time for a new challenge at Country View Challenges! The theme chosen by Teresa is Opposites. I chose opposite weathers so sun and rain...


I stamped the Umbrella woman (Lost Coast Designs) with Versafine Onyx Black and stencilled the Visible Image stencil with Distress inks.

To get my rain I stamped one of the images from the Water drop set (Craft Emotions) with Memento Fog grey ink.

The sentiment is from an old set (Magnolia - Inspired by Stamping), also stamped in Versafine and die-cut with an arrow shape (MFT Blueprint 13).

This was actually meant to be a one layer card but at the last hurdle I had an accident with the Stamping Platform lifting the card with the clear stamp, despite the magnets, so I stamped the sentiment on a separate piece of card and hid the initial blurry stamping.

I hope I have inspired you to enter our challenge, remember one lucky crafter will win a £20 voucher to spend on Country View Crafts goodies...

Thanks for coming by,
I am entering the AllsortsSSS Wednesday,  Addicted to stamps challenges.