Saturday, 13 November 2021

Maximize the embossing


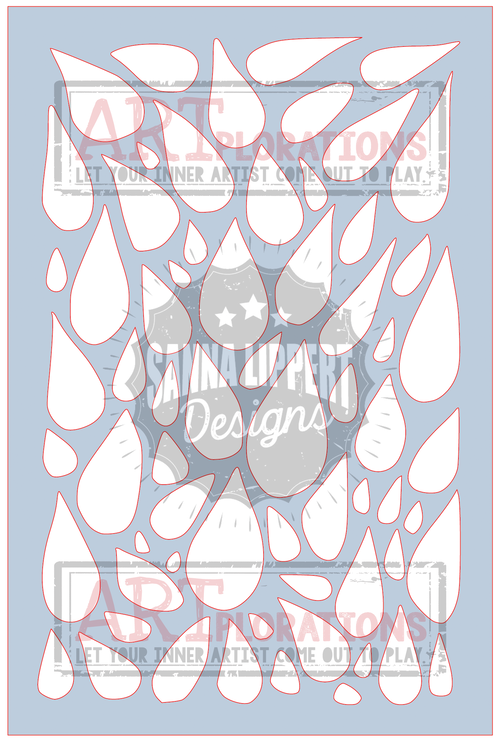
For my second Mixed Media tutorial on the STAMPlorations blog, I am elevating the stencilling with the Embossed Textured paste technique.
This give a more dimensional effect to the stencilling as if embossing with powders multiple times, like this: 

Texture paste and embossing with stencil

Supplies:

Texture paste (mine is Grunge Paste from Paper Artsy)
Embossing powder (mine is Wow! in Perissa, a mix of silver, gold, and copper red )

A look at the beautiful shine....

Once you've mastered the technique nothing stops you from combining it with others... for instance adding powders in an ombre design like I did on this card:

Embossed textured paste with STAMPlorations stencil

Supplies:

Texture paste (Grunge paste as before)
Embossing powders: Wow! Vintage Peacock, Seaglass, Blue Pearl and Frantage Aged Aqua (Stampendous).

Just for you... the shine look!


Do check out my step by step on the STAMPlorations blog.  I will be back next month for a new technique...

Thanks for coming by,
I am entering the SSS MondaySSS WednesdayAllsorts,  challenges.


Sunday, 7 November 2021

Snarky Cats Christmas 5

More Christmas snarks...

Here's an accident waiting to happen...


As before, the cats and sentiments are from the Snarky Christmas Cats stamp set (CMS 416) from Tim Holtz/Stampers Anonymous stamped in Memento Black and coloured with pencils.

I created a snowy slope for the cats to glide (and stand) on with Distress ink and a mask made of torn paper.

Mmm...it's going to hurt!!! 

Thanks for coming by,
I am entering the SSS Monday, PaperbabeStamping Sensations, We Love Stamping challenges.


Monday, 1 November 2021

More coasters

Some organised people have all their Christmas gifts bought and wrapped by now, having used the whole year to scour the shops for that perfect present....  Well, not me and certainly not this year!

However, WHAT do you buy for the person that has everything? How about a crafty gift made by you and and for that special person? Christmas gifting is the theme of our Country View Challenge this month, chosen by Miriam and I hope you will get ideas from our DT. 
 
My first idea is coasters, I have been creating a few, each time in pairs, and this is my latest offering:


My base is recycled coasters but your can find fresh ones with a holder here.I created the background with Cosmic shimmer matt acrylic paints, this took several layers as I changed my mind... including adding some copper paint here and there. 

My choice of image is from 2 Visible Image sets: the spiral clock from Ahead Of Our Time and the shattered clock and matching background from the Somewhere In Time.

Once dry I stamped my motif with Cosmic shimmer Flake and glitter Glue using a piece of Distress foam and applied my flakes. You can find similar colours to the one I used with these mixes: Silver DreamWarm Sunrise both from Cosmic Shimmer. Now being the control freak that I am I don't just dump the flakes haphazardly on the image... noooo I try and place a gold flake here a copper flake there etc... but you don't have to do that! 
Once all the image is covered I start removing the excess with my fingers , then with a dedicated sponge (it looks a bit like wire wool but made of plastic thread).

For the shattered clock I first stamped the background stamp with black to enhance the contrast with the foil.

I added a bit of darker colour around the coasters with a Pitt brush pen.
Now these will join the other pairs to get their hard core varnish so they can be used for hot or cold drinks.

And of course let's look at the SHINE.... 


Over to you now, have a look at what the DT made on the Country View Challenge blog and link up your project to the challenge for the chance to win a £20 voucher for the Country View Craft shop. Just remember that cards do not qualify for this challenge. 

Thanks for coming by,
I am entering the Paperbabe, SSS Wednesday challenges.

Thursday, 28 October 2021

Snarky Cat Christmas 4

4th in my Snarky Christmas Cats line-up this CAS card.

Maybe he feels like Scrooge, maybe he's been swaddled too tight... 
but he certainly doesn't look too happy to see the baubles!

Snarky cat looking at Baubles

The cat and sentiment are from the Snarky Christmas Cats stamp set (CMS 416) from Tim Holtz/Stampers Anonymous stamped in black Versafine and Memento Rhubarb Stalk.
The baubles are from the Studio Light Stamp And Die Set - No.17, I stamped them in Memento 
London Fog and coloured with red pencil. 

I hope he brings a smile to your face nonetheless...


Meow, meow I will be back!!!
I am entering the SSS WednesdayAddicted to stamps, Allsorts, Casology and Paperbabe  challenges.

Friday, 22 October 2021

CAS card with elephants

A quick post for a quick card!

I used this lovely stamp  from Creative Stamping magazine #57 (May 2018) to make this CAS card.

If you like the stamp,  the original red rubber by Crafty Individuals is still available (CI-390).

The background has been created with Distress inks and one of the stamps from Andy Skinner's ASCRS06-Toxic set (Stampendous).

The sentiment (also from the Creative Stamping set)  is usually applied to Birthdays but it seems fitting for this mother and baby image (and my current state of mind), since no matter that your offspring can legally drive, vote, drink and have left home, they are still your babies..

Thanks for coming by,
I am entering the UnikoRiver of Creativity, Paperbabe, Stamping Sensations, challenges.

Friday, 15 October 2021

Amp up your stencils!


This Autumn I am starting a Mixed Media feature on the STAMPlorations blog.

I have chosen 4 different techniques that will add oomph/zing to your stencilling. First up the "bump" technique which gives a shadow or highlight impression as in the background of this card:

Adding extra to simple stencilling

It is normally used with acrylic paints, since the technique needs the medium used to be opaque.

Supplies:
Flowers 2 - ARTplorations
Basic A2 Panels Nesting Dies
Flutter Zen 1 Layering Dies
Everyday Sentiments

For those who prefer inks I tested an alternative on this card:

Bump technique with inks and pencils

Supplies:
Peeking Dahlias - ARTplorations
Everyday Sentiments

Do check out my step by step on the STAMPlorations! blog

Thanks for coming by,
I am entering the SSS Monday challenges.


Tuesday, 5 October 2021

Autumn colours

Hello crafters!

I am back for a  second inspiration make for our Country View Challenge, where the theme for is 
Autumn colours, chosen by Corrie

I used the Autumn colours for a gender neutral birthday card:

Stamping with Brushos

 The impression is imperfect, especially in the centre, due to the technique and the texture of the paper I used,  NOT the stamp, which is actually very detailed, probably too detailed for this technique.

I sprayed water on my stamp, Paisley Script Background (Crafty Individuals CI-435) and then sprinkled Brushos with a fine paint brush. With this method I can get 3 to 4 impressions with just one inking.

I added the sentiment,  a Hot Foil embossing die (Ultimate Crafts Happy Birthday). 

There you have it, quite simple really if a bit messy. Next time I will know to use a smoother card though!


Thanks for coming by,
I am entering the  SSS WednesdayAllsortsPaperbabeWe Love Chocolate Baroque challenges.

Friday, 1 October 2021

Young wild and free

As much as as I have tried to ignore it Autumn is upon us, school and universities are in session again and  the only silver lining is the beautiful colours of the falling leaves.
Following on last month's Country View Challenge, the theme for October is Autumn colours, chosen by Corrie

Mixed Media on Gelli print

I have created a journal page with that fabulous Lady stamp set from Stamperia that I hadn't even inked since getting it last year. It is a big stamp, too big for most cards but excellent for journaling and Mixed Media!
I started with Gelli printing my background with acrylic paints, mainly DecoArt Mixed Media, I then added stencilling details with Yellow Ochre and Gold paints with the "Wall Music and writing" stencil from Stamperia( KSTDG01).

I stamped the Lady image with Versafine Clair in Pinecone on a separate piece of cardstock, coloured it with pencil and fussy cut it before placing on the background. I added a bit of Distress crayon in Vintage Photo around the image to detach it from the background.

Finally I found the perfect sentiment for my lady in the stamp set "Life is so much better" (from Chocolate Baroque), designed by fellow blogger Brenda .

Mixed Media Journal page Autumn colours

Over to you now, have a look at what the DT made on the Country View Challenge blog and link up your project to the challenge for the chance to win a £20 voucher for the Country View Craft shop.
Just remember to use only Autumnal colours (yellow, red, browns, muted greens +black, white and skin colours).

Thanks for coming by,


Sunday, 19 September 2021

Snarky Cat Christmas 3

Definitely my "stamp (set) of the moment, here is another Christmas card with the Snarky Christmas Cats stamp set (CMS 416) from Tim Holtz/Stampers Anonymous.

For this one, I took inspiration from the sentiment and imagined Santa on his way to deliver gifts to this naughty cat and changing direction after checking his list! 
Poor cat... he does looks crestfallen!! 
CMS 416 - Stamp set  by SA/Tim Holtz
The card is simply stamped with BlackVersafine and Memento Rhubarb stalk for the Ho sentiment. I added colour to the hat with pencils .
The "Ho" and footprints are freebie stamps from the now defunct, and greatly missed, Craft Stamper magazine.

I do hope you are enjoying these as, yes, there are still more, many more...

Thanks for coming by,
I am entering the Allsorts, We Love Chocolate BaroqueStamping SensationsLost Coast DesignsAddicted to stamps and Paperbabe challenges.

Wednesday, 15 September 2021

Autumn Leaves


Welcome to my second inspiration make for our Country View Challenge,  hosted by Jane, who chose Leaves (The leaves are falling) as the theme.

This time I created a journal page with Autumn colours:

Stamping into paste with stamps

Texture paste stamped into with ELB33

First I applied some texture paste and stamped into it before it dried completely with Paper Artsy ELB33 leaf stamps. Judging when the paste is ready is the most difficult and I did have a few false starts!

The texture paste I used was also an experiment, as I used the Cosmic Shinner Multi-Tex powder to make it. What is the point of making your own paste?

For me having a single pot of dry powder to make a custom recipe for a project means that I

a) need only one pot instead of  many AND

b) the product will not dry in the pot between uses because I don't use a particular product often enough.

In effect it saves me both space and money!

Dye inks are absorbed into pastes

Once the paste had dried I sprayed lightly with water and sprinkled Brushos powders. Unfortunately I had forgotten that dye inks do get absorbed in  texture paste and when dried the colour was very much faded...:

I put plan B in motion... which means using a pigment rather than a dye (something to do with the molecular size of the particles) so I pulled out my Paper Artsy Frescos and painted on several colours trying to match the colours I already had underneath.

For the focal point I sprayed Distress Oxide in Walnut Stain, which dried out turned out grey blue, I guess this is how this colour "oxidises"... Never mind, grey could work too.

I die-cut a bunch of leaves from remnants of Gelli prints with added inks here and there.

For the sentiments I used rub-ons to spell my quote, an in joke in our family hailing, in a roundabout way, from Game of Thrones.   


Over to you now, have a look at what the DT made on the Country View Challenge blog and link up your project to the challenge for the chance to win a £20 voucher for the Country View Craft shop.


Thanks for coming by,
I am entering the Inspiration Station (the colours and Autumn theme inspired me), Simply Create TooSweet Stampin', and the Alphabet challenges.

Thursday, 9 September 2021

Snarky Cats Christmas 2

Did you like my Snarky cat on a sledge? Well here's another Christmas card with the Snarky Christmas Cats stamp set (CMS 416).

CMS 416 - Stamp set  by SA/Tim Holtz

The card is simply stamped in either Memento London fog, coloured ink or black (the bells) and coloured with pencils.

There's more to come... I am aiming for 10 cards in the same style...

Thanks for coming by,
I am entering the Allsorts, SSS Monday, Paperbabe,  and Stamping Sensations challenges.

Wednesday, 1 September 2021

Tropical beach Journal page

Summer is almost over and what a damp squib that was in this country! Yes, whilst some of Europe and America burned (literally in some cases), England still is a green & pleasant land!!! 

On our Country View Challenge, which this month is hosted by Jane, we want to see leaves. Well you might be thinking of the ones which fall and turn to yellows, reds and browns but... not me!  As I said, I didn't have my summer yet so I am taking you with me to the beach in this journal page.

Beach scene created with stamps and dies

I first created a fiery sunset with iridescent sprays (my current supply includes the older Prima Color Blooms and the new Cosmic Shimmer Airless Misters). The Airless Misters can be sprayed at any angle which makes life easier and they do not clog.  After drying, I stamped the trees which are part of the Tropical Sunset stamp (Crafty Individuals CI-497).

I added a bit of blue pencil for the sea, white accents for the waves with a Distress Crayon and a bit of pencil for the sand texture.

Finally I added my die-cut leaves from a coloured piece of card (combination of watercolour and Distress inks) and a bird (from the CI-272 stamp set)

Over to you now, have a look at what the DT made on the Country View Challenge blog and link up your project to the challenge for the chance to win a £20 voucher for the Country View Craft shop.

Thanks for coming by,
I am entering the SSS Monday, SSS Wednesday challenges.