Today we are kicking off the new challenge at
Country View Challenges with the theme of Use a Stencil.
Also, alongside our Challenge, we are running a Blog Hop with a Sizzix Big Shot Machine & Die Bundle as the prize. To enter, you must be a Follower of our Challenge Blog and Hop along to each of our Design Team Members Blogs and leave a comment. We will still be running our normal monthly challenge and those who link their Use A Stencil projects will also be entered into our £20 Voucher draw. The Winners will be picked at random in early June.
I am first in the hop
Christine ------> You are here!
Gabrielle
Jennie
Rachel
Sue
Evelyn
Doreen
Nikki
Monika
Hazel
Brenda
Corrie
Jane
Lots of possibilities with stencils and, for this first project, I wanted to use "flat" techniques with the stencils. [It turns out later that I couldn't resist a bit of dimension..]
You can use stencil as a resist with a variety of mediums that all work in a different manner.
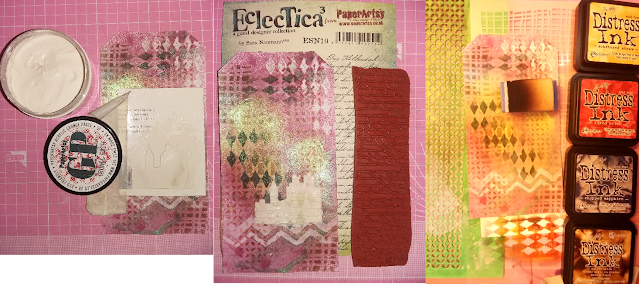
Here I have chosen Gesso and MicroGlaze (now available from Rangers as Distress Glaze).
Gesso gets slightly tinted by the dyes in the sprays whilst the MicroGlaze is totally impervious to wet media... on top. I did get some staining from underneath however, as my tag got wet through!
So it looks distressed... let's call it a happy accident and carry on...
For sprays I used all different brands as I have been buying one bottle every time a new brand comes along in order to find the Holy Grail (the fine spray bottle that doesn't not clog even with micas). If you're wondering, I do have a promising lead but have to
play test some more.
Both of the stencils used for resist have been die-cut with thin dies using junk mail.
The Harlequin is the Tim Holtz Mixed Media 1 and I was lucky to manage cutting this recycled plastic. Generally plastic yields to the pressure of the dies, indenting the material, but not cutting it through.
After the sprays were thoroughly dried, I used stencils with Distress inks. That's when I decided to stencil my London skyline (also recycled junk mail) with texture paste rather than inks. For good measure I then stamped into it before it dried completely.
I won't tell you how long to wait because it depends on so many factors, I haven't worked it out for myself! The trick is to create a test area of the same thickness on a piece of scrap paper to test when it's ready.
I painted the city in black and used Treasure gold in Amethyst (Paper Arty) to pick out the details, then decided to stamp a few things in black ink on the tag itself and a quote on a piece of card.
Quote and compass are Rubber Dance stamps, the cities borders are from Flonzcraft.
In this photo you can see how shiny the micas are, and reflect the light intensely compared to the Treasure gold.
The final touch is an arrow (Tando Creative) which, although made of fairly thick chipboard), can be embossed in a standard embossing folder. After embossing I pressed the arrow into my black dye inkpad and when dry I brushed Tresor gold in Amethyst and White Fire.

I hope you like my tag and that you will try out these, or one of the many stencil techniques available. Come and join the
Country View Challenges with your stencilled makes.
Don't forget to leave a comment below before visiting my teammate Gabrielle for your next stop on our hop!

I am entering the tag in the
SSS Wednesday Challenge and
Tando Creative challenge.
 Entering the Graphit Markers, SSS Monday and Polka Doodle challenges


