Spare a thought for those December babies... forever overshadowed by that most famous of babies and somewhat neglected when it comes to their birthday.
Some can feel quite prickly about it.... (no names here but I know someone very close, ahem, in that case).
With this in mind I designed this birthday card especially for the December born.
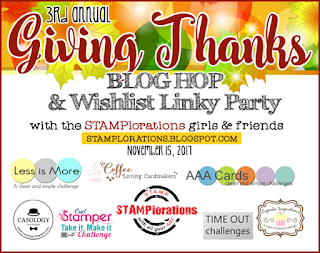
To celebrate Thanksgiving, Stamplorations have organised their 3rd Annual Giving Thanks blog hop and you're all invited to join! Plus, you can link your Stamplorations products wishlist for a chance to win it, the Wish List Linky party kicked off Monday.
There are 35 participating designers all in all in the hop (complete list below) -- with 8 talented guest designers from the various challenge blogs that STAMPlorations has had the privilege to sponsor in the last year.
This is a long post, but well worth getting to the end if you like Stamplorations designs and a BARGAIN...
********
Although Thanksgiving is a uniquely US celebration, I decided to make a card on the theme anyway, as I have wonderful memories of a Thanksgiving dinner where orphaned lost souls, be it foreigners like me or just too far from home, gathered for a traditional turkey dinner.
I can't remember if pumpkins were involved, but hey they bring a little bit of sunshine with their vibrant orange hues in an otherwise grey November...
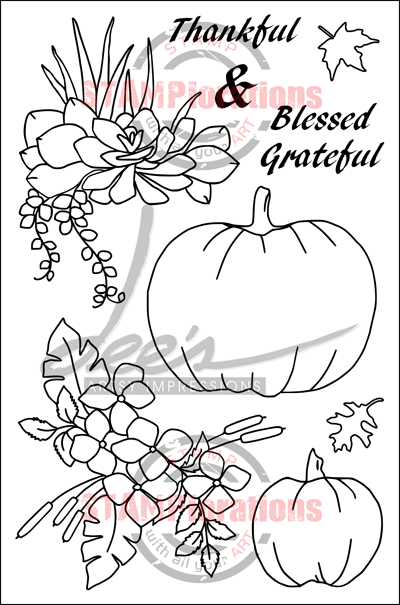
I stamped the small pumpkins from the newly released Thankful & Blessed onto yellow cardstock with Distress Oxide in Fossilized Amber, coloured them with pencils and fussy cut them.
The big pumpkin, from the same set, was stamped on ivory card with yellow die ink. For the colouring I first applied watercolour pencils dry and then used the brush to dissolve the paint.
To anchor my pumpkins I added shading with pencils and a few leaves, stamped and coloured.
The big pumpkin is sandwiched between 2 pieces of card cut with the Stitched Snow Hills dies.
I embossed the sentiment, also from the Thankful & Blessed, with Wow EP in Fairy Tale, you can see the glint of the glitters reflecting off the base!
When Thanksgiving is all over, or if you don't celebrate it where you live, you can still use the pumpkins, which at the stroke of midnight turn into... flowers!
I stamped and embossed the small pumpkins with Sea Glass EP from Wow! on a piece of leftover masterboard and fussy cut them. I added a stalk by die-cutting twice another piece of Masterboard with the ever useful Stitched Snow Hills die. The center of the flower has been filled with Ranger Enamel Accent.
I pulled out some old paper with inclusions (they were all the rage moons ago) to use as a mat for my flower, and completed with a sentiment from the Thankful & Blessed stamp set.
Don't delay and start hopping... You have until the end of the month to leave comments and link up a project or two of your own. There are prizes to be won for linking projects, commenting along the hop and also on Facebook and Instagram, as well as the chance to win your Stamplorations wishlist. You'll find all the details here.
And if you're not one of the lucky winners.... Shery has thought of you too, with a fab Thanksgiving Sales:
* If you do order, mention in the notes section of the order, that Craftyfield sent you there for a free word die (up to $10) of your choice. This is an offer you can't pass up ladies... *
You should have arrived here from Carol and your next stop is : Kathy. If you get lost, the full list of participants is below.
Enjoy the hop!
Both cards are entering the SSS Monday challenge.
3rd Annual STAMPlorations Giving Thanks Blog Hop & Wishlist Linky Party Participating Designers
Yes, it's that time of the year again, when we crafters REALLY need to knuckle down and produce, en masse, those Christmas cards!
Today, I have chosen a design going to the heart of the matter, with a simple Merry Christmas sentiment die-cut as the focal point of an otherwise very simple card.
Come by the Craft Barn blog to read my step by step, this is a quick one, which I hope will come in handy for your Christmas makes.
In what is becoming an annual event I have been making my "rubbish" tags again....
As you can see they are all different, which is not ideal for mass making but is an excellent way of using up some scraps, rather than binning them.... hence the "Rubbish" tag moniker!
Deer tag:
Creative Expressions Warped Circles Stencils
D. Oxides in Picked Raspberry and Twisted Citron
Memory Box Deer die-cut
Scrap of foiled cardstock.
Versafine ink
Wow Embossing powder in Fairy Tale
X-mas tree:
Crafter's Companion Pearlescent patterned cardstock
Memory box Christmas tree die
Green Distress and pigment inks
Wow Embossing powder in Fairy Tale Die'sire Merry Christmas die
Butterfly tag:
Gelli print with Starlight paints
TCW Mini Specimen stencil (TCW454S)
Grunge paste tinted with acrylic paint
Versafine ink
Clear EP
Stamp from my own collection
Branches tag:
MFT Snowfall Stencils
Branches Die-cut
Prima Heavy Gesso
Graphmaster acrylic paint marker Merry Christmas stamp (Freebie from magazine)
Versamark
White EP
Signpost Tag :
Gloss paper and Ranger alcohol inks
Spellbinders Victorian Signpost S2-177 die
White embossing powder
Merry Christmas stamp (freebie from magazine)
The light conditions are so difficult at this time of the year I photographed all my tags in direct sunlight to show the shine and also in the shade to give a better idea of the colours, especially for the very shiny Butterfly and Signpost tags.
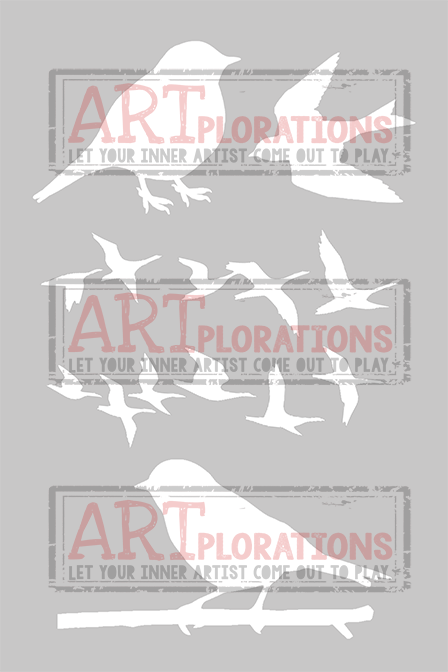
I chose to go with the theme and, since Halloween was only a few days ago, I made a tag using the orange and violet colours usually associated with the event.....
Did you notice that the ARTplorations Stencil Some Birds has the same motifs as the Trendy Birds 2 stamp set? When I did, I immediately saw the opportunities available when combining them. Furthermore, the stencil comes with both the positive and negative shapes so you get the mask AND the stencil for even more possibilities!
For this tag I used the bird mask and applied it on the cardstock with removable adhesive. I sponged Distress inks, both regular and Oxides to the whole tag. Replacing the mask with the stencil, I coloured the bird with Distress ink in Wilted violet.
I kept the stencil attached in case I needed to apply further colour and proceded to stamp the bird with a combination of Salty Ocean and Wilted violet Distress Oxides.
I stamped a sentiment from the same set and added two leaves from the Trendy Leaves set, stamped with dye inks.
Hop on over to the Stamplorations blog for more inspiration from my teamies and do join us in our Theme & Sketch Challenge.
If you do, you might win a lovely Stamplorations prize...
Lots of scope with this theme so I decided to make a journal page and experiment.
On the left hand page I used the stencils with acrylic paints, applied with a piece of Distress foam.
On the right I used a technique akin to brass rubbings. The pages of my journal being fairly lightweight, even after a coat of gesso, this technique still works with a thin stencil like this.
To take the "rubbing" I hold the coloured pencil very flat against the page, pressing quite firmly and the design appears as by magic! (my inner child had lots of fun with this...)
In the next step, I added washes of acrylic paints in yellow, orange and magenta (DecoArt) across the page and, with a sponge, added black paint all around to frame the pages.
Onto the stamping... I have many stamps related to travel, here I used Rubber Dance Globe map, La Mappa, Venezia and Vintage Hotel receipt which have been added to the Country View Crafts shop. I used a variety of ink colours to give an impression of faded ink.
Finally, I couldn't help but throw in some die-cut words from the Adventure and Vacation WordsThinlits by Tim Holtz/Sizzix.
I hope I have inspired you to join in our challenge, remember there's a £20 Country View Crafts voucher for grabs, so crack out the stencils and start crafting!
Just enough time to squeeze in another pearlescent make in the Paper Artsy challenge, still inspired by Alison/Craftytrog (you can read her post : here), this one with a more Vintage look.
I used Paper Artsy ELB33 for the background motifs and the central flower is by Rubber Dance from the Antique Botanicals set.
I had to emboss with clear EP all of the stamping, as I found out that the ink I used just wouldn't dry on the pearlescent glaze!
Difficult to capture the shine, especially in artificial light (and with a phone camera instead of my trusty traditional camera) but here goes, the "Shine" shot:
As my followers are probably sick of the sight of my posts, I promise no more posts until the 1st of November...
I did warn you there'd be more posts this weekend...
Still working with Alison/Craftytrog techniques for the Paper Artsy challenge (her post : here), I tried a different version in a monochrome colour scheme for a manly feel:
The stamps I used are from the HP1008 set and a crakle motif (Crafty Individuals) to supplement the feeble crackles I got from the paint.
And of course, tilt the board to the light and hey presto, pearlescence...
I followed Alison technique quite closely so I won't bore you with the details, I 'll just mention the stamps I used, a flower from the HP1111 and the leaves from ELB33.
And since the challenge theme is pearlescent, I should try and show you a bit of that shine, which doesn't come out very well under artificial lighting.
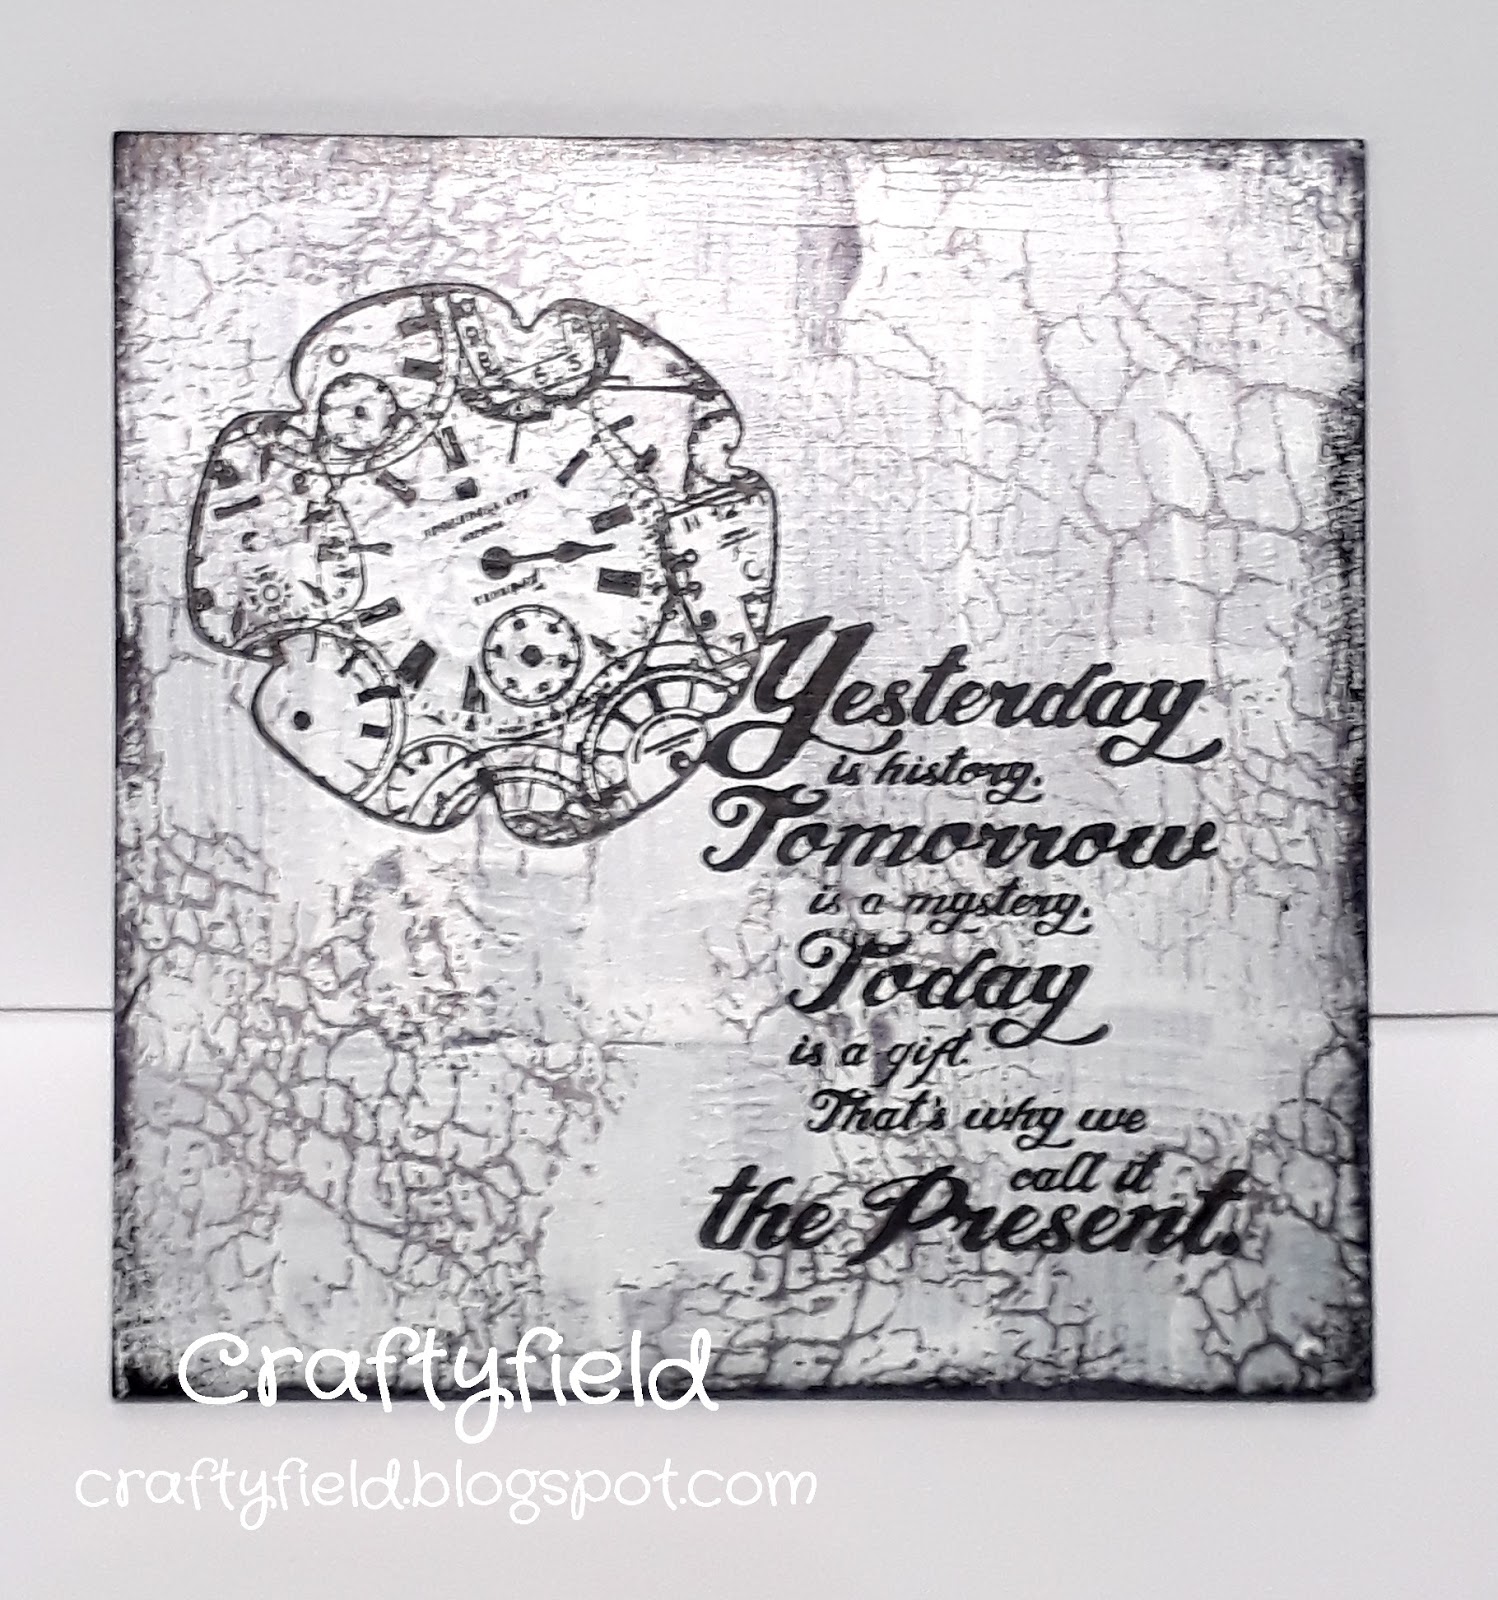
The wooden hinged diptychs remind me of Byzantine icons and this is the inspiration for my Craft Barn DT post today.
The past, and present face each other on the inside:
I used several techniques to give an aged look to my diptych and you can read all the details on the Craft Barn blog.
Supplies:
Hinged wooden icon
Gesso
Paper Artsy stamps from LCP02 and HP1008
Brilliance ink in Graphite Black
DecoArt and Paper Artsy Fresco paints
Mini layering stencils TH010
Gilding wax
Crackle medium
Today on the Craft Barn blog I'm showing how to create some inserts for your Midori (Fauxdori). I did a step by step for the cover last month which you can see here.
Some pics to whet your appetite:
Come and find out on the Craft Barn blog how I did these and other inserts, plus a lot more pics...
Warning you might need to get a cup of your favourit beverage at hand, this is a long post!
Thanks for coming by,
I am showing my make to the Mini Album Makers, as it completes last month's album, which did make the Top 5 BTW...
It's time to show you a second inspiration piece for the Stamplorations Theme and Sketch challenge. If you missed my first post you can find it here.
This month's theme and sketch are:
Today I made a card following the theme only and chose blue and violet as my colours.
First I die-cut a length of masking tape with the Stitched Snow Hills - CUTplorations and applied it on the whole card. I created a gradated path from blue to violet with Distress inks.
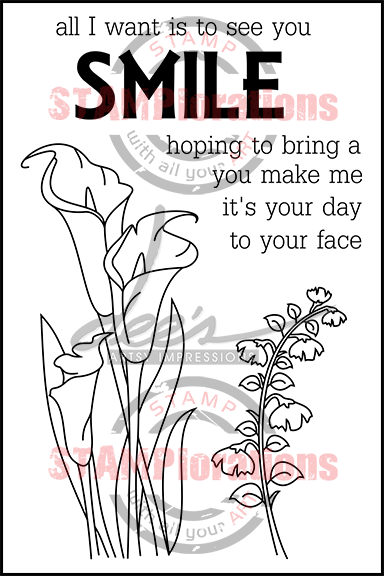
I stamped flowers from Dee's Artsy Impressions - Smile set, with the masking tape still in place, for my background motifs.
In the foreground, I stamped the calla lily from the same set with black ink after removing the tape. To colour I first retrieved the white of the card with bleach, then used coloured pencils.
The sentiment stamped in black ink from the same stamp set completes the card.
Let's have a look at the whole card front and back:
Hop on over to the Stamplorations blog for more inspirational makes from the DT. You still have 10 days to enter the challenge and you don't need Stamplorations products to enter.

 I am entering the Craft Stamper TIMI, Penny Black and more, Fashionable Stamping, We Love To Create, Creative Artist challenges.