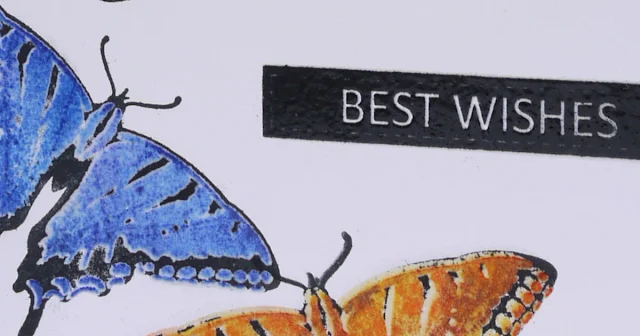
Although it looks simple it does take some time and effort to make and it's a good idea to make a series of cards at the same time, as once set-up it doesn't take much more time to stamp one or 10 cards.
The Layered Buds and Butterflies stamp set comes with butterflies in several sizes, most of which have 2 layers, an outline and a more solid image. Obviously they can be used independently but do come in their own when both layers are combined. This is what I did and took photos along the way.
My aim was to stamp the outlines in black and the solid images in colour, to obtain a realistic butterfly look. In practice, it meant stamping in colour and embossing in clear powder, then stamping with black ink, resisted by the embossing. However not all butterfly pairs work the same...
For this first pair as shown right I stamped the outline first in black ink and aligned the solid stamp over it to be picked up by my stamp positioner.

 I then stamped with blue ink and embossed this butterfly.
For the next one, I stamped the detailed image in colour first (you have to use a pigment ink in order to emboss).
I then placed the solid image on top, picked it up with the stamp positioner and stamped it in black ink.

 You can see the embossing resisting the black ink on the photo left. This you have to remove, and there is a nifty trick. With the stamp still in place on the stamp positioner, clean it and stamp again.
 The stamp will pick up this extra ink, clean the stamp again and repeat until most of the ink is off the embossed area. You can finish with a soft cloth. See how clean the yellow butterfly looks now?
I did the same for the larger butterfly, stamping it twice to finish my flurry.
I added one of the 2 sentiments in the set, also embossed with clear ink and here's the finished card:
Supplies:
Creative Expressions Clear Stamp Set - Layered Buds & Butterflies
Aladine iZink pigment inkpads
Embossing inkpad
WOW! Embossing Powder - Clear
Thanks for coming by,
 I am entering the Mervi's card challenge, SSS Wednesday Challenge, That's Crafty and Fashionable Stamping challenges.


It's a really lovely CAS creation with the Butterflies Christine.
ReplyDeleteB x
Beautiful cas card, love those colouful butterflies, very elegant card.
ReplyDeleteThank you so much for entering Mervi's Card Challenge and celebrate my journey on the blogland, good luck;-))m
Completely worth the effort - your butterflies are stunning against the white - beautiful intricate stamping.
ReplyDeleteAlison x
J'aime beaucoup ta carte, elle est vraiment superbe.
ReplyDeleteCI a un ensemble de tampons papillons avec aussi les empreintes positives et négatives, tu me montres une manière de les utiliser, j'essaierai de ne pas l'oublier... (je ne sais pas pourquoi, mais je ne peux plus épingler d'images sur mes tableaux Pinterest Grr)
Bises
Un superbe rendu au final. je n'aurais pas pensé laisser le fond blanc moi. comme quoi. tu as bien fait !!!!bises
ReplyDeleteOh your butterflies are gorgeous and they make a brilliant beautiful card.
ReplyDeleteThank you for joining us at Simon says Stamp Wednesday Challenge.
luv
Debby
The butterflies look beautiful against the white background and it was interesting to read how you achieved the look.
ReplyDeleteThanks for sharing with us at Fashionable Stamping,
Avril xx