Today is my second inspiration post for our Country View Challenge where the theme is Bokeh.
And yes, as the title suggest, another morning... although this one is very abstract,
so it really is up to you what you see in my make!
I have no step by step because I had no idea where I was going with the piece of cardstock I started with. I applied some Fresco paints in Butter, Pumpkin Soup, South Pacific, Blue Oyster and Claret. I did this in several layers until I was happy with the result.
I then used a DIY stencil and a foam sponge to apply gesso for the Bokeh effect, and here too I had to apply several coats to get the circles to stand out.
I added some stamping with the Paper Artsy set ELB33, the dotty border and corner with Distress Oxide in Denim and the wheat in Versafine Clair Pinecone. Neither of these inks dried on the acrylic paint and I hastily embossed with clear EP.
I stamped the sentiment from the same set with Black Versafine and embossed with Wow! Chai Latte EP, which has a subtle sheen and slight opacity.
I hope you like my make and will play with us at Country View Challenges, there's a £20 voucher to win...
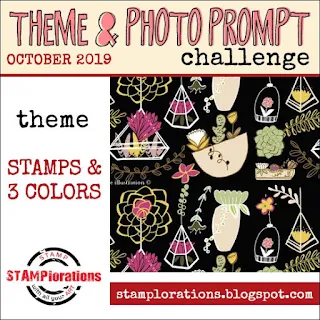
Today starts a new term at STAMPLorations and the old Theme & Sketch challenge has now evolved into the Theme & Photo prompt challenge.
In this card I tried to replicate the photo inspiration's stark contrast of the black background with the colours of the motifs, by using an emboss resist technique.
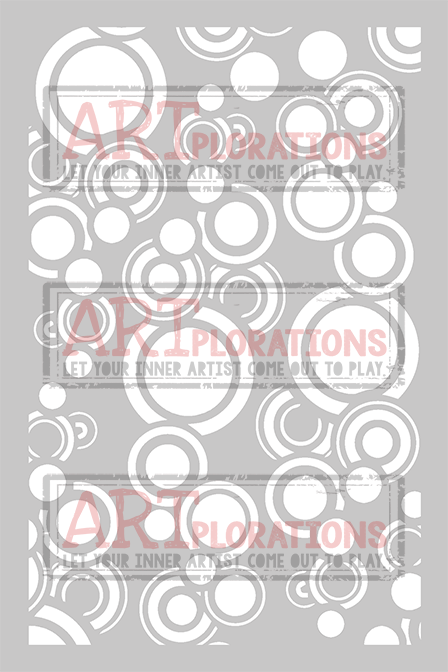
First I applied Distress inks on the lower half of my card and through the Retro Circles Stencil on the upper half.
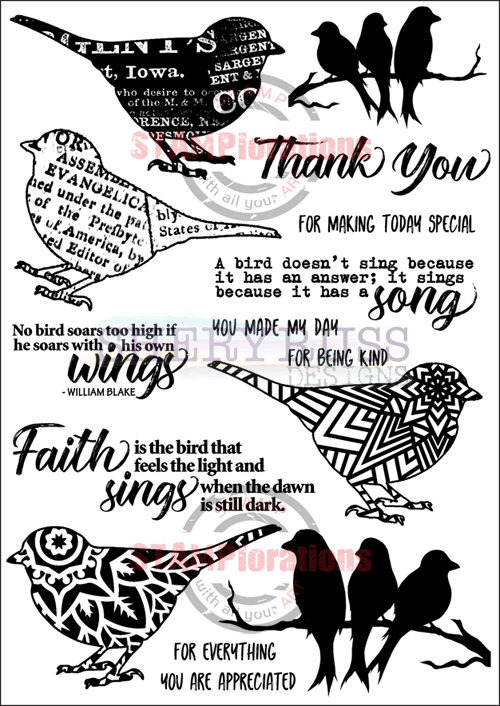
Then I stamped and embossed with clear powder 4 of the images from the For the Birds set.
Next comes the scary stage... I took a Memento Black inkpad and "smooshed" it directly on the card. I chose this method rather than paint and brush to avoid getting the cardstock too wet.
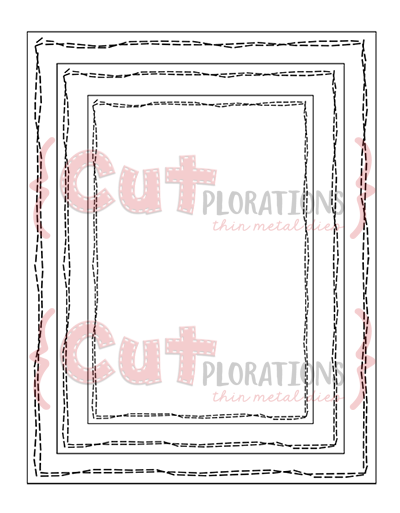
Taking a cloth I rubbed over the embossed areas to reveal the image underneath. The ink also picked out the detail of the embossing from the Crazy Double Running Stitch Rectangle Nesting Die, giving a distressed effect I liked.
I added a sticker sentiment from the Shine Bright set and voila, my finished card:
Your turn to create something with 3 colours or less and/or following our photo inspiration. There are prizes to be won... a $15 gift certificate to the winner and $10 to the runner up chosen by a DT member as well as a $5 gift
certificate each to three randomly drawn players.
***
And don't forget, whenever you shop for STAMPlorations products you can get 20% off with my code: STAMPGIRLCRAFTY
Welcome to my first inspiration post for Country View Challenges. The theme this month, chosen by the lovely Sue, is Bokeh.
The effect I was after was a foggy early morning. I used Picture this stamps to build my port scene (Fisherman's wharf and Captain's Cottages) at low tide an used both Distress Oxide and classic Distress inks to colour the scene. The D.O being slightly opaque allowed me to push the houses further into the background whilst the looks closer.
For the Bokeh effect, I stencilled circles with Distress Oxide in white pigment ink and Gesso .
I do hope you will join us at Country View Challenges this month, I can't wait to see your makes with Bokeh! Plus, there's a £20 voucher to win...
Thanks for coming by,
I am entering the SSS Wednesday challenge.
This is my second inspiration post of the day both for my Crafts U Love, and I have another Christmas card with a design suitable for mass making .
Using the largest thin frames of the Julie Hickey Frame & Banner set I die-cut a piece of black and a piece of white cardstock. For this card I used the black frame and the "inside" of the die-cut white card. Like my previous design, the leftover can be used for another card in reverse colours, avoiding waste and saving time!
From the Boughs of Holly Wreath I die-cut and embossed the bow and die-cut the small wreath.
You can add the date and sentiment with either dies, stamps or stickers and, if you are addicted to Nuvo Drops as I now am, as many drops as you wish or have time for.... The holly berries holes in the die-cut wreath are crying out for Nuvo drops, I think!
Supplies:
Tonic Studios Essentials Die Set - Boughs of Holly Wreath
Studio Light A6 Paper Pad - No.119
Julie Hickey Designs Layers, Frames & Banners Die Set - Rectangle
Tonic Studios Nuvo Stone Drops - Gold Rush
Should you purchase any of the products I have used on this card, select 'Design Team' in the 'where have you seen us' drop down so we know we have inspired you!
There you have it, a simple fairly quick and easy to mass produce design, with a very classic feel. If you missed my first post you will find it here.
Thanks for coming by,
I am entering the SSS Wednesday challenges.
I know it's still a bit early... but all the new craft stash is in the shops now and as I am less interested in Halloween, I wanted to carry on the x-mas production! In fact this is the first of 2 posts published today both on the Christmas theme!
I created this design to satisfy the following objectives:
- few supplies
- low wast
- easy
- quick to make in batches
I used a green and a red 6"x6" piece of cardstock, plus some white glitter card and the dies sets shown.
To cut the large wreath, I used the actual wreath die and the "inside" edge die.
Cutting the inside allows to keep to one layer and saves the green inside to make another card in the reverse colours. There is barely any waste, apart from the confetti from the wreath which goes straight to the bin without contributing to the ever growing scrap mountain.
The greeting is cut from the thick-ish glitter card but I still managed a clean cut with 2 passes in the die-cutting machine.
Using the same design but with other colour combinations you can quickly build up a stash of cards, all unique!
For example:
- Associate Gold and white with either Green, Red or Black for traditional Christmas
- Silver and white with Blue or Lavender for a contemporary look
- or Kraft, white and red for a rustic vibe
Of course you can add any number of finishing items, but as I had the rather loud Green and Red combo it was a case of less was definitely more… so I limited the embellishments to a bow which I die-cut (same set as the wreath) from the glitter and red card.
Should you purchase any of the products I have used on this card, select 'Design Team' in the 'where have you seen us' drop down so we know we have inspired you!
Don't forget I have a second X-mas design coming up very soon.
Thanks for coming by,
I am entering the SSS Wednesday challenge.
Please to finally post something again as I have been less present than usual on my blog. I was spurred on by the Allsorts challenge which had me at "trees" since I can't resist buying tree stamps....
Thank you so much for your lovely comments on my last post, many of you enjoyed the Alcohol Lift Ink technique. It's not that a similar effect couldn't be done another way, but it certainly was the easiest! And since you enjoyed that technical post... here's another one for you.
Today the technique is compliments from the Distress Oxides.
I wanted to create a background of Autumnal leaves to my tree image and wanted leaves and trees to use the same hues but the background had to be less bright.
I happened on this property of Distress Oxides when, by chance, I used it on photo paper and found that the dry "pigment" part of the ink, a whitish powder, was rubbing off the photo paper at the slightest touch.
And when the pigment is taken away there is no "Oxidation" effect anymore but the brightness of the Distress dyes comes to the fore.
Even at the stamping stage you can see that whilst the dye ink has been transferred to the photo paper a lot of the pigment stayed on the stamp.
Next I started buffing the stamped image with a paper towel and you can see the difference in brightness between the buffed area and the untouched image.
To assemble the card I used a Stitched rectangle die (from one of the MFT Blueprints), and the STAMPLorations Crazy Double Running Stitch Rectangle to cut the background and the mat. I then added the Hello (Tim Holtz/Sizzix Sentiment words) and a leaf brad.
And now for the full reveal...
Stamps used:
The leaves are from the Paper Artsy ELB33 set.
The trees are from the Crafty Individuals CI-429 set
Hope you like my card and have enjoyed reading about the D.O technique!
Yes it's time for my second inspiration make for the Country View Challenge, where the theme chosen by Rachel is Under the Sea.
This time I used alcohol inks to build up my background, and, together with the Alcohol lift ink and Yupo paper from Ranger, I had great fun creating water effects .
First I tried to simulate the broken light seen in moving water by using crumpled plastic to lift the ink, then with a small eraser and embossing tools I lifted the bubbles above the fish.
I then stamped my fish (Paper Artsy Hot Pick 1111) with Memento Tuxedo black ink on a piece of paper prepared with an iridescent medium and fussy cut them before placing on my background.
At this point I decided to add "coral" by lifting the colour with the top of a tree stamp. You can see the before photo:
To achieve the effect, I actually stamped the "coral" twice, once with the Alcohol lift ink and once with an Archival ink. The first pass with the Alcohol lift ink allowed me to lift most of the colour and the second pass added a bit of colour (one was stamped in pink the other in orange) which was blotted to leave just a hint of colour.
The technique relies on having a stamping platform but it is very effective, even on such fine detail as these tree branches (a Crafty Individual stamp from the CI- 450 set).
I will leave you with the shine shot and hope you will join us at Country View Challenges with your own Under the Sea creations!
A few challenges pushed me to come out of my creative lethargy and I made this humoristic card (it will hopefully elicit a chuckle if not an out and out laugh!)
I first stamped the otter in black and masked it. The grasses were stamped on top with green dye inks and I applied some Distress inks behind the animal. Both stamps are from a set issued with issue 57 of Creative Stamping (May 2018). as is the sentiment.
Again, too quickly, back to school is upon us, the heat of the sun is fading and the beach is but a memory. Here at Country View Challenges, we have a final helping of sea albeit underwater... the theme chosen by Rachel for September (Under the Sea).
I hope my first inspiration make gives a good impression of an underwater scene!
I made a card base from a 6" by 14" piece of cardstock and partially die cut the bottom with the outline die from the Studio Light Ocean View and made a mountain fold about 1" from the bottom, to get a folded card of 6"x6". I die-cut white cardstock with the second die and coloured it with alcohol markers before gluing into place.
I decorated the front of the card with an underwater scene from Crafty Individuals paper pad No 6 and stamped and coloured the turtle (CI-413) with pencils on a separate piece of card.
The turtle is attached to a piece of acetate I affixed to the back of the very first fold so that the animal leans back when the card is opened and not forward (yes I got that wrong the first time...)
Over to you... create a project following our Under the sea theme for a chance to win a £20 voucher in the Country View Crafts web shop!
This time I stamped the image on glossy paper and added inks with Distress foam to create a sky and snowy hills background using masks cut from paper.
After the first stamping with Memento black, with the stamp still on the Stamping platform, I cleaned it and inked some of the falling snow with a Versamark embossing pen and stamped over the black impression. I then embossed with White Glitter EP.
I used 2 papers from the Studio Light PPSL19 pad to decorate the front of my card base and cut a label using Julie Hickey Designs Layers, Frames & Banners Die Set with both white and red cardstock using the inside of one and the outside of the other. I added Nuvo Drops on all the pierced holes of the scalloped label frame and, since I had it at hand, I couldn't resist adding some on the brownish dots of the paper.
Do have a look at the other stamps Studio Light have released for this Christmas, they are just as great as the Deer, you can find them here.
Should you purchase any of the products I have used on this card, select 'Design Team' in the 'where have you seen us' drop down so we know we have inspired you!
Too soon for Christmas? Hmmm… I like doing some Christmas crafting closer to the date to enjoy the general festive feeling, but, if you plan to make elaborate cards, the earlier you start the better. Because, making cards under time constraints feels less like fun and more like work!
Today's inspiration post for Crafts U Love is such a card: it's an interactive card, made with the Square Spinner die, and has 3 decorated sides.
You will notice that the card is oriented in portrait mode and although I have not seen any like that online there is no reason why it shouldn't be done. The interactive part pops out below rather than on the right side when the card is opened but otherwise it works in the same way.
For the mechanism I will send you to Karen Burniston herself and this video.
Steps:
1. First work on the front panel of the card.
- If you want papers on the inside, start by sticking them in place, then die cut the opening with your chosen shape die.
- Die-cut the opening from the paper to place on the outside of the front panel and stick down.
- add any flat decoration at this stage to the front cover
2. Decorate the inside back panel with the desired papers.
3. Die-cut, prepare and stick down the Square Spinner mechanism (refer to Karen's video)
4. Place the focal image and the spinning element on the mechanism
5. Add any dimensional details to the front now.
I wanted to my card to be slightly larger than A6 which did make things a little bit more difficult as a whole sheet of paper didn't cover my card entirely, however this pushed me to come up with a more creative design.
The papers I used are from the Studio Light PPSL19 pad, which has a festive feel but a fresh contemporary black, white and gold colours scheme.
The deer image is from the Studio light essential Stamp set No.391 stamped with Versafine for that solid silhouette look. I picked out some of the falling snow with the Nuvo Drops latest incarnation, the stone texture, in gold.
I also used it on the front to add a heart and pearls. As you see the finish when dry is rather matte and grainy too, like a mix of paint and fine sand. This thicker texture requires a bigger nozzle and for that reason it would be difficult to write with the Stone Drops unless you used big letters.
And in action as demonstrated by my not so glamorous but helpful assistant:
Should you purchase any of the products I have used on this card, select 'Design Team' in the 'where have you seen us' drop down so we know we have inspired you!
I will be back for another Christmas creation at the end of the month, I hope you will come back to check it out.
Today is my turn to inspire you to enter our Country View Challenge on the theme, "Textures" chosen by the lovely Miriam.
My make is effectively a pendant to my first inspiration make, it's here if you missed it, but this time I used more masculine colours and embellishments and, of course, 2 different techniques for textures.
On the left, I used dry embossing with 2 embossing folders (Cuttlebug script and X-Cut Chronology Clocks) directly on the greyboard (after applying the gesso). Although the standard die-cutting machine sandwich needs to be adjusted for the thickness of the greyboard it will still emboss beautifully.
On the right I applied grungepaste with a knife and stamped into it with a bricks stamp (Katzelkraft) and a lead window design from a Prima Finnabair stamp set (Finnabair cling Trust the Magic). Whilst I was doing it I decided to throw in a bit of Infusion powders before the paste dried.
I then sprayed the Infusions and let the colours run down and merge into each other taking care of the right hand side colours.
For the left hand side, I used Distress Oxides all over in Fossilized Amber, Fired Brick and a little Walnut. To highlight the texture a bit more, I added standard Distress ink in Walnut on the high points of the embossing. I didn't get the depth of colour expected but I forgot how gesso has a tendency to suck the dyes from above layers!
I flicked some water and some black paint to finish the background.
The focal image are 2 Paper Dolls I combined on top of torn vellum pieces, mat and die-cuts.
Finally I added some cardboard cogs I had painted and rusted previously.
Your turn to create something textural to enter our Country View Challenge and be in with a chance to win a £20 voucher to spend on craft stash!

 I am entering the Addicted to Stamps, Bleeding Art, Craft Stamper, We Love To Create, Creative Artist challenges.